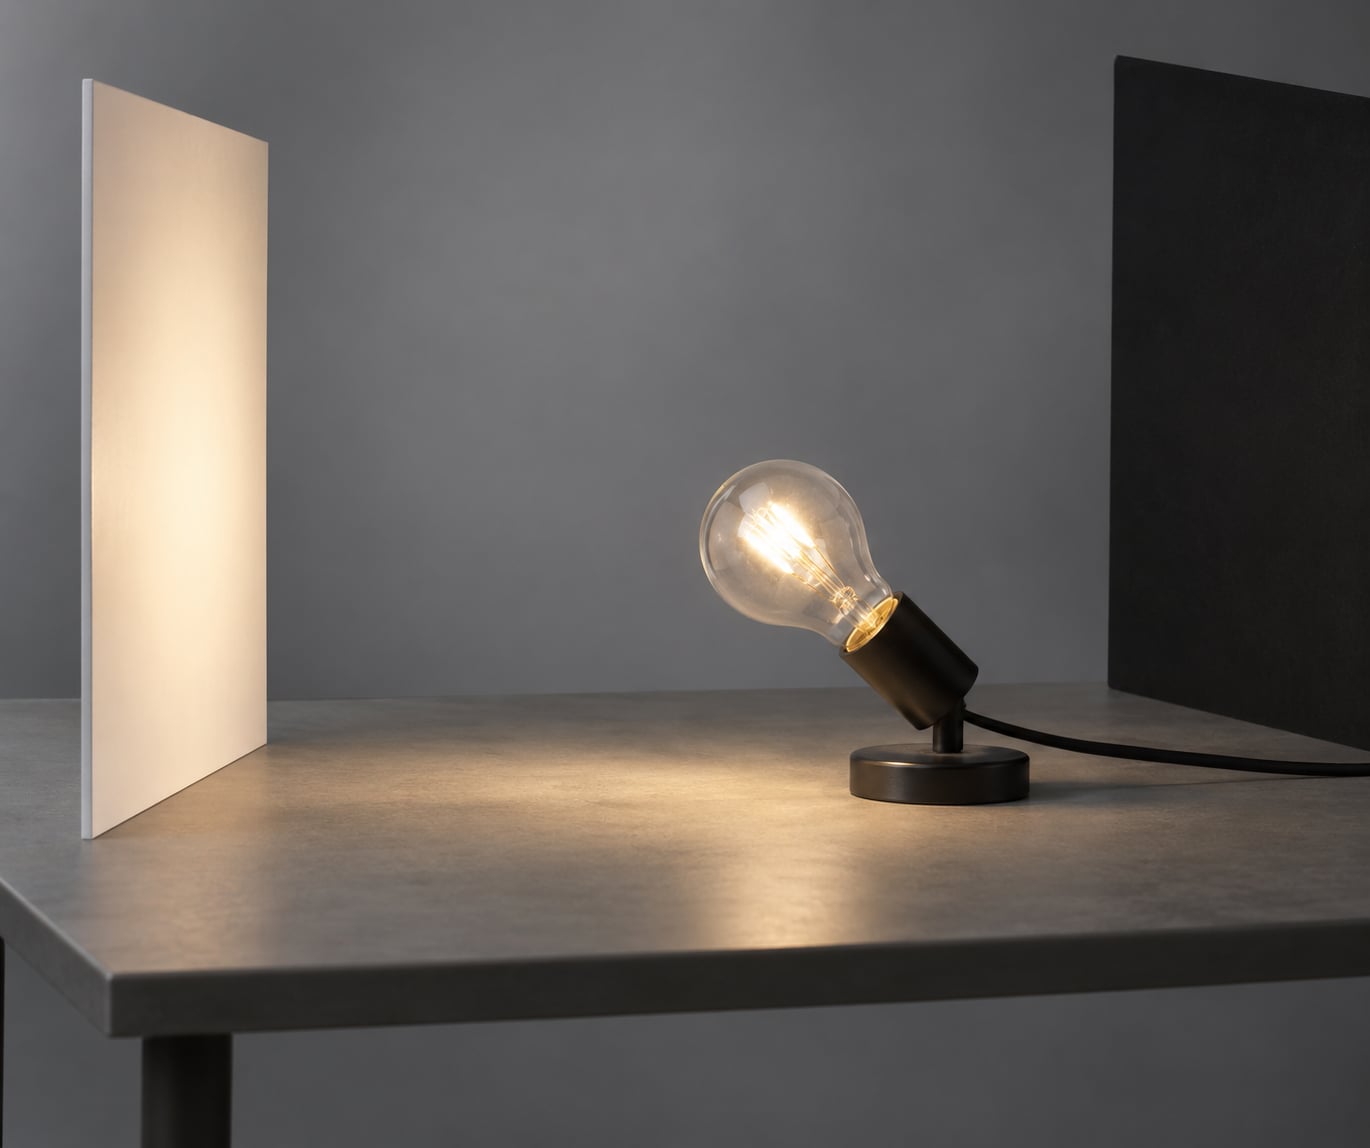
A flat portrait is one where there is not enough contrast between the light and shadow side of the face. The shadows sit too close to the midtones, the head has no visible turn in space, and the subject reads like a cut-out pasted onto the background. That is why the question comes up so often, and the good news is that it is a lighting and posing problem in about nine cases out of ten, not a camera problem.
Three-dimensional form only becomes visible when a dominant light creates a lit side, a shadow side, and a soft transition between them. Kill any one of those three cues and the face collapses into a flat shape. You can diagnose which cue is missing in about two minutes, without buying anything.
Here are the eight causes that account for nearly every flat portrait I have seen, roughly in order of how often they turn out to be the culprit:
- The light is on the camera axis, so both sides of the face get the same brightness.
- Fill is too strong, usually a reflector or bounce held too close.
- The light source is both large and close, so shadows have no edges left.
- The subject is standing too near the background, or the background is the same brightness as the clothing.
- The pose is symmetrical, with shoulders square and the head facing the lens.
- The camera is dead level and too far away, with no foreground or foreshortening.
- The edit has a flat tone curve with lifted blacks and no local contrast.
- Clarity, dehaze or sharpening have been pushed hard enough to chew the shadows apart.
Table of Contents
- What You Need
- Step-by-Step
- 1. Check Whether the Lighting Is Too Even
- 2. Add a Distinctive Key-to-Fill Ratio
- 3. Use Directional Light to Reveal Texture
- 4. Create Separation Between Subject and Background
- 5. Pose for Dimension Instead of Symmetry
- 6. Choose a Perspective That Adds Depth
- 7. Focus Attention with Contrast and Composition
- 8. Add Dimension in Editing Without Overcorrecting
- Common Mistakes: Why Your Portraits Still Look Flat
- Frequently Asked Questions
- Why do my portraits look flat even when the lighting is bright?
- Is a reflector the best way to make a portrait look less flat?
- Does a wider lens always make portraits look more three-dimensional?
- How do I make a portrait look dimensional in editing?
- Why do my black-and-white portraits look flat compared with color portraits?
- Can window light create a flat portrait if I use it incorrectly?
What You Need
None of the fixes below need new gear. What they do need is the ability to control direction and brightness, and that control comes from four places.
- One light with a known position. A window, a lamp with a shade, a speedlight, a strobe, or the sun. Its angle relative to the face matters more than its power.
- Something to block light. A black card, a piece of foam board painted matte black, a V-flat, or even a dark towel on a stand. This is the negative fill that lets the shadow side stay dark.
- Something to bounce. A white card, a reflector, a pale wall or a sheet of foam board. Use it as a weak fill, not a floodlight.
- An editing tool with masks. Lightroom and Camera Raw have them built in; Capture One, Affinity Photo and the phone editors do too. Curves plus one or two local masks handle most of the rescue work.
A lens matters less than people expect here. A 35mm and an 85mm can both produce a strongly dimensional portrait if the light and pose are right. Focal length changes how much of the background you include, not whether the face has form.
Step-by-Step
Work through these in order. Each step assumes the previous one is already handled, because fixing step six when step one is broken just gives you a flat portrait in a nicer composition.
1. Check Whether the Lighting Is Too Even
If the brightest part of the face and the darkest part are within about one stop of each other, the lighting is the cause. Even, frontal, broad light is the single most common reason portraits look flat, and the giveaway is shadows under the nose, in the eye sockets and under the chin that match the shadow value of the cheeks.
Move the key light roughly 45 degrees to one side of the camera and slightly above eye level. Do not go all the way to the side yet, and do not bring it much higher. Watch what happens to the shadow side of the face: it should get darker than the lit side by a visible margin, and the nose shadow should fall diagonally across the cheek rather than straight down.
2. Add a Distinctive Key-to-Fill Ratio
A portrait gains depth from the gap between the brightest and darkest areas on the subject, and that gap is called the key-to-fill ratio. Almost everyone fills too much because a dark shadow side feels like an error rather than a choice.
Start at roughly a 3:1 ratio, which puts the shadow side about two stops under the light. Then take the white reflector and move it further from the face. A reflector at 30 centimetres behaves like a second key light; the same reflector at a metre behaves like a soft lift. If you have no reflector, put something black on the shadow side instead, and let the ambient light there fall away on its own.
3. Use Directional Light to Reveal Texture
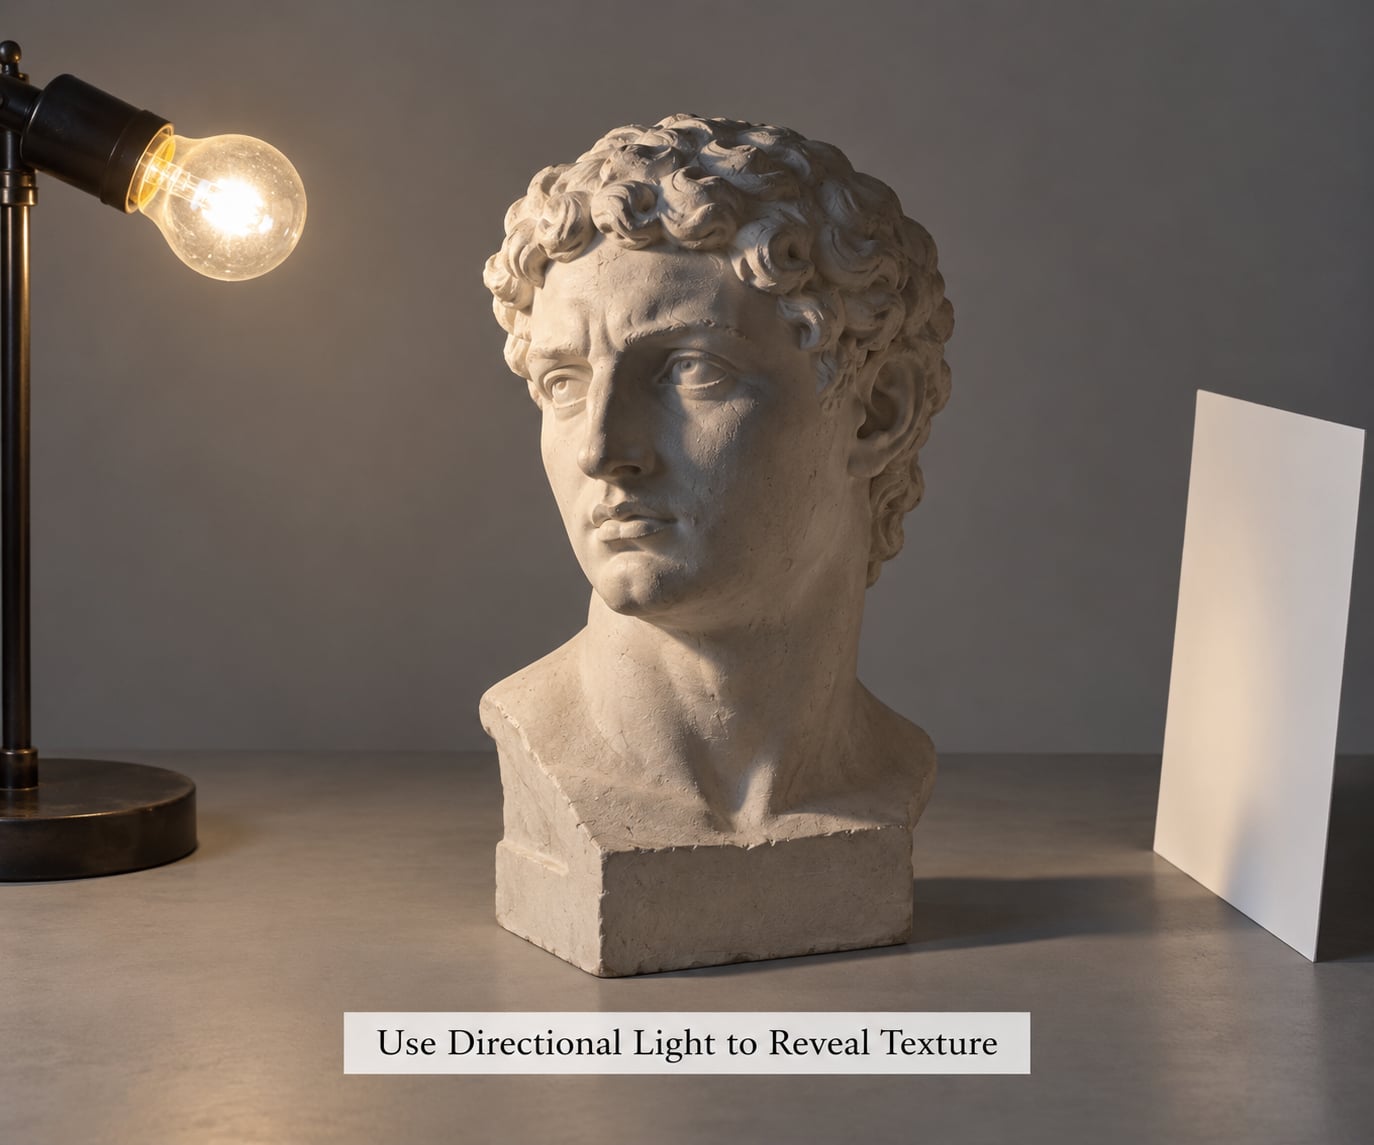
Directional light is what describes a three-dimensional form. A small or bare source moved to one side puts highlights on the cheekbone, the brow and the bridge of the nose, and drops shadow into the eye socket and the hollow beside the mouth, so the head reads as a solid object turning in space.
Backlight and rim light do the same job from the far end, drawing a bright line along hair and shoulder that separates the subject from the background. Large diffused sources do the opposite, which is why a big softbox close to the face produces that smooth, shadowless, plastic look people describe as flat and soft at the same time.
4. Create Separation Between Subject and Background
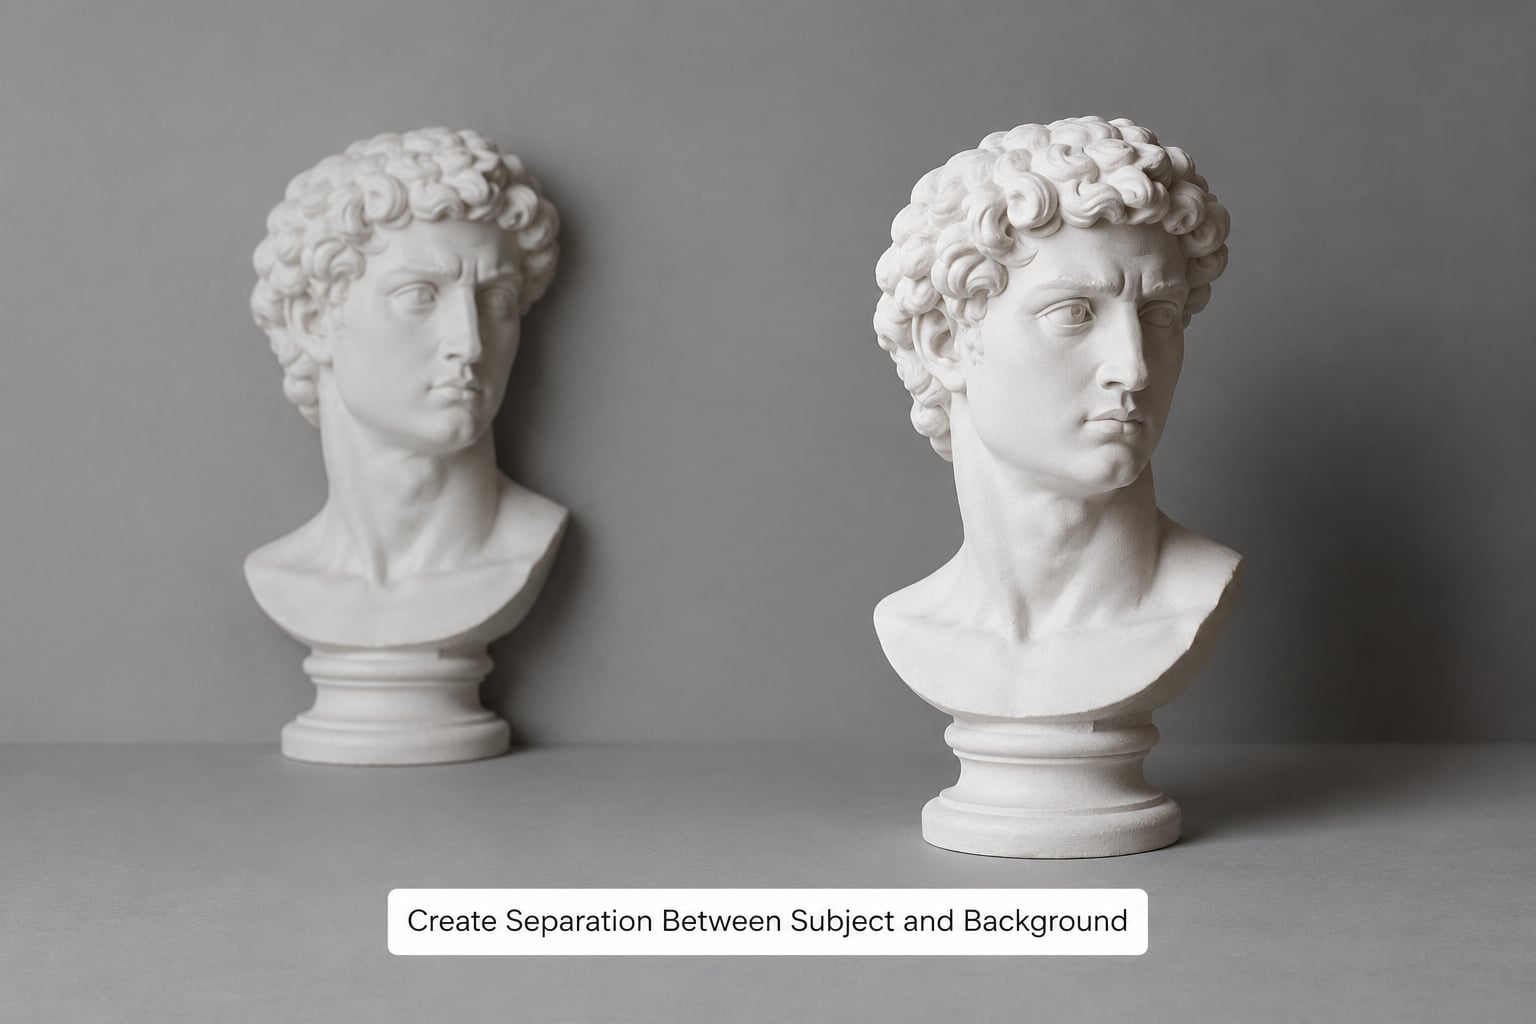
Move the subject a metre or two further from the background. Light falloff means the background gets darker and less detailed as the distance grows, so the same lighting rig immediately produces a darker backdrop and a brighter subject with no extra gear.
Then check brightness, not just colour. A white shirt against a white wall has no separation no matter how good the light on the face is. Either choose a background a full stop or two away in brightness from the brightest clothing, or use a shallow depth of field to blur it into a soft field. A hair light or rim light buys you separation even when the background colour is hopeless.
5. Pose for Dimension Instead of Symmetry
A square-on pose flattens a face because there is no turn for the light to describe. Turn the body about 30 to 45 degrees away from the camera, then bring the face back toward the lens so the eyes still meet it. The shoulders now sit at an angle to the frame, which gives the eye a plane to read.
Then add small asymmetries: chin forward and down a touch instead of back and up, one shoulder dropped, hands doing something rather than hanging. Ask the subject to turn their head a few degrees past the camera and then come back, and keep the frame you get at the moment they are slightly past centre. That gesture does more for depth than any lighting change.
6. Choose a Perspective That Adds Depth
Camera height and shooting distance change how much depth a frame shows. Shoot from slightly above or below eye level rather than dead level, and move closer with a wider lens rather than standing far back with a long one. Close wide introduces foreshortening, so a hand in the foreground reads as nearer than the face behind it.
Long lenses from far away compress everything into a single plane, which is why a headshot taken from five metres with a 200mm often looks flat. That compression is a feature for flattering backgrounds, so the fix is not to abandon the long lens, it is to give the frame a layer or two of separation: a blurred foreground element, or a background far enough away to fall off.
7. Focus Attention with Contrast and Composition
Flat-looking frames are often flat because nothing in them is emphasised. If the background, the clothing and the face all sit within a narrow band of brightness, the eye has no entry point and reads the whole frame as one plane.
Decide what the picture is about, then make that element the brightest, sharpest or most contrasted thing in the frame. A darker area of background, a diagonal line running into the corner, or a clear area of negative space beside the subject will pull the eye. Tonal contrast does more work here than any amount of colour.
8. Add Dimension in Editing Without Overcorrecting
A rescue edit in Lightroom or Camera Raw follows a fixed order. First, put the tone curve back: drag the black point down until the darkest areas are genuinely dark, and lift the highlights only slightly. Flat files usually have a compressed value range, so the curve needs an S-shape rather than a global contrast slider.
Second, brush the depth back in with dodge and burn. Darken the shadow side of the face, the area under the jaw, the eye sockets and the background, and brighten the forehead, cheekbone and the light side. Small adjustments of a few tenths of a stop go a long way, and masking tools are far better at this than a global slider.
Third, set the white balance so the light and shadow families differ in colour temperature, usually warm light against cooler shadows, because temperature difference reads as depth even at identical brightness. Then add a touch of texture or clarity to the subject only, and hold back on dehaze, since the slider that looks exciting on screen is the one that makes skin look gritty. Finish with selective sharpening on the eyes and hair, leaving everything else soft.
What editing cannot do is invent a light direction that was never recorded. If both sides of the face were exposed at exactly the same brightness with no shadow anywhere, there is no hidden data to recover, and that frame has to be reshot.
Common Mistakes: Why Your Portraits Still Look Flat
- Filling every shadow. A reflector on both sides gives two soft keys and no form. Use fill on one side only, and let the other side fall.
- Treating a big softbox as automatically flattering. A large source close to the face erases texture and the shadows under the nose and chin. Large and far is the look, not large and near.
- Mixing light sources with different colours. A warm lamp plus a cool window splits the face into two colour families at the same time as two brightness families, and the result reads muddy. Turn off whatever you do not need, or gel it.
- On-camera flash pointing at the face. The classic Stack Exchange complaint is exactly this: the flash sits on the lens axis, so it lights both sides equally. Bounce it, or move it 45 degrees off axis and dim it, then add a flag on the shadow side.
- Photographing under a big soft sky at midday. Overcast and open-shade light is genuinely low contrast. Do not try to fix it in the edit. Use shade, add a background or a rim light, or wait for direct light and turn the subject so the light comes from the side.
- Squaring the pose to the frame. Even with good light, a square-on body and a centred head kill the turn. Step five costs nothing and usually does more than the light change.
- Over-editing the file afterwards. Heavy dehaze, heavy clarity and heavy sharpening destroy the shadow detail that was doing the work, so the frame goes from soft to crunchy and still reads flat. Back the sliders off and do the work with masks instead.
One habit worth building: shoot the same portrait twice, once with the light where it is and once with the light turned 90 degrees around the face. The difference between the two frames is the fastest proof you will get that form comes from direction, not from gear.
Frequently Asked Questions
Why do my portraits look flat even when the lighting is bright?
Brightness and contrast are different things. A face lit evenly from the front can be perfectly exposed and still have no shadow side, so the brightest and darkest areas sit within about one stop of each other. The fix is direction: move the key light 45 degrees to one side and above eye level, keep fill on the shadow side to a minimum, and let the shadow side drop two or three stops under the light.
Is a reflector the best way to make a portrait look less flat?
Usually the opposite. Most flat portraits are over-filled, and adding a reflector makes that worse because a white card close to the face acts like a second key. If you use one, put it on the shadow side only, angle it so it just lifts the darkest area, and move it further away until the shadow side is roughly two stops under the lit side. Black foam board on that side is often more useful than white on the other.
Does a wider lens always make portraits look more three-dimensional?
No. A wide lens adds depth only when you get close enough for foreground elements to be much nearer than the subject. Shoot wide from far away and you simply get everything large and evenly spread across the frame, which reads flat. A long lens shot from the same distance compresses the background, which is flattering for separation but does nothing for the modelling on the face itself.
How do I make a portrait look dimensional in editing?
Work in order. Put an S-shape into the tone curve and pull the black point down, then use dodge and burn or masks to darken the shadow side of the face, the eye sockets, under the jaw and the background while lifting the forehead and cheekbone. Set white balance so the light and shadow families differ slightly in temperature, add texture rather than clarity, and sharpen the eyes selectively. Small local changes beat large global ones.
Why do my black-and-white portraits look flat compared with color portraits?
Converting to black and white removes the temperature difference between light and shadow that was helping you read depth, so the tonal separation has to do all the work on its own. Convert to black and white early, then judge the value range with the grayscale check: squint at the image and if you cannot separate the shadow side from the lit side, add contrast and dodge and burn before you convert back.
Can window light create a flat portrait if I use it incorrectly?
Yes, and it is the most common beginner setup that goes wrong. A large window is a huge soft source, so placing the subject right beside it or facing it head-on lights both sides of the face evenly. Turn the subject about 45 degrees so one side of the face is close to the window and the other falls away, keep them a metre or two back so the background goes dark, and put a dark card on the side facing away from the glass.
If your portraits look flat, change one thing on the next session and nothing else: put the key light 45 degrees to one side, take the reflector off the shadow side, and step back from it with a black card. If the shadow side of the face is visibly darker than the lit side at that point, the rest of the fixes, the pose, the background distance and the edit, all get easier.