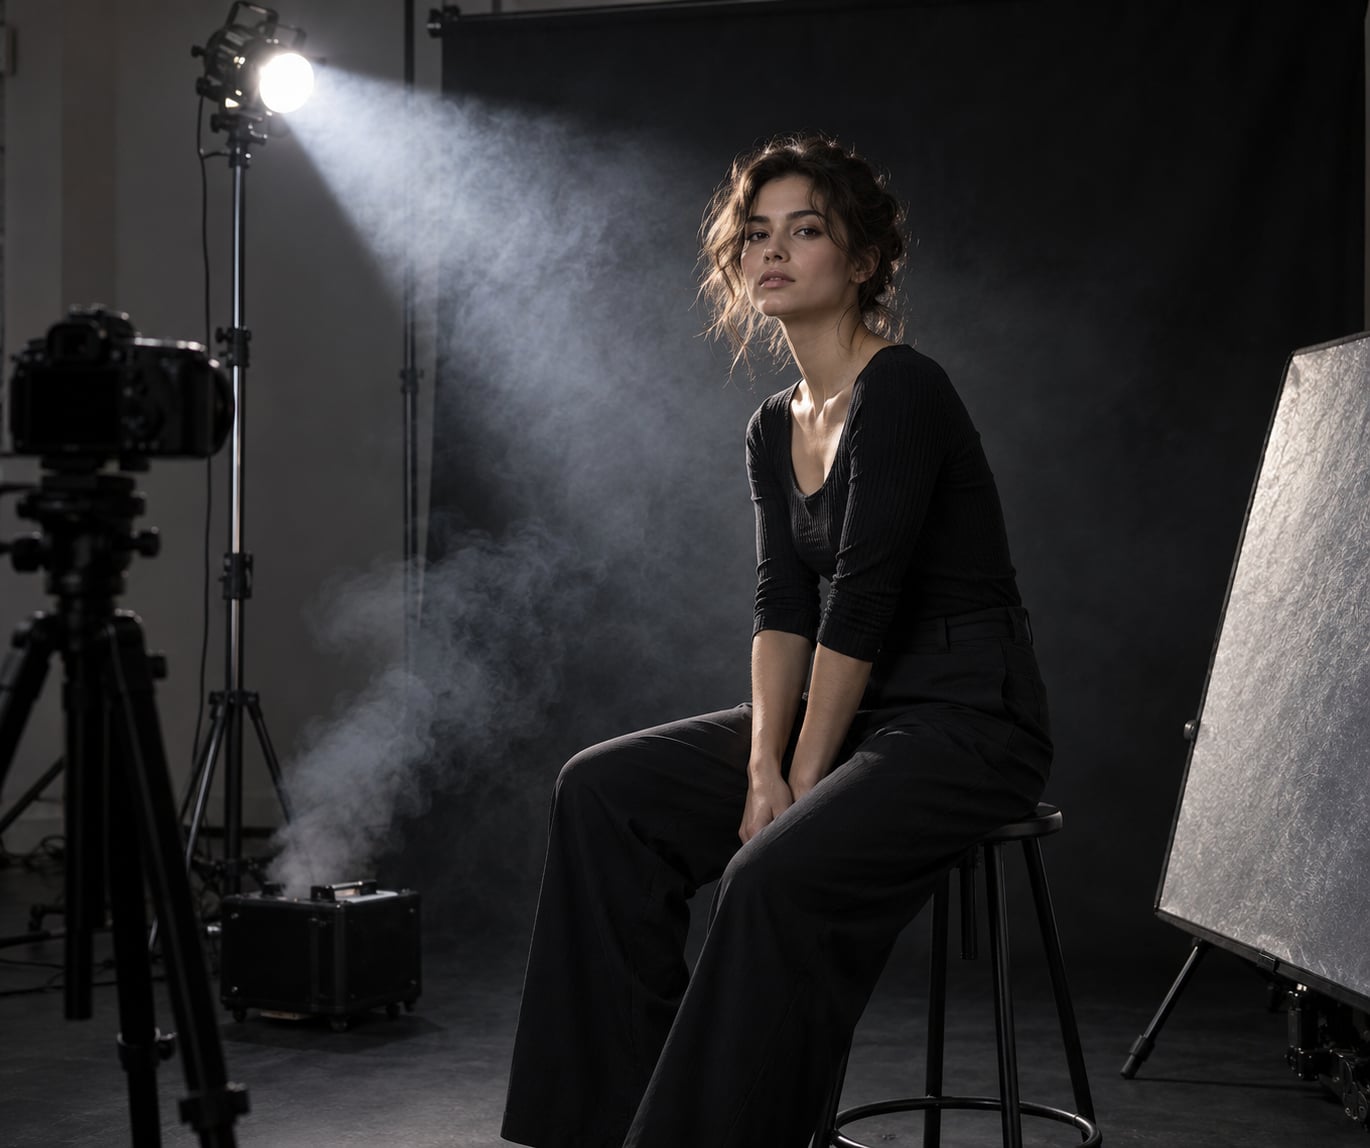
Fog and smoke work because they scatter light. Add a thin layer behind your subject, hit it with a hard light from behind and above, shoot against a dark background, and the particles turn into visible beams and texture. Put the same fog between the camera and the subject and it flattens the face, dulls skin tones and wrecks contrast. That one placement decision explains most of what separates a good atmospheric portrait from a ruined one.
Learning how to use smoke and fog in a portrait shoot is less about the machine than about the light. The fog is only the medium. What you do with a hard back source, a negative fill, and a background you can kill entirely is what makes the effect read as cinematic instead of hazy.
A full setup takes about 20 minutes once you know the sequence, and a room needs roughly 10 to vent after you finish. Smoke from bombs behaves differently and costs you control, so most working portrait shooters I know use a fogger indoors and reserve coloured smoke for outdoor work where the wind is predictable.
What You Need
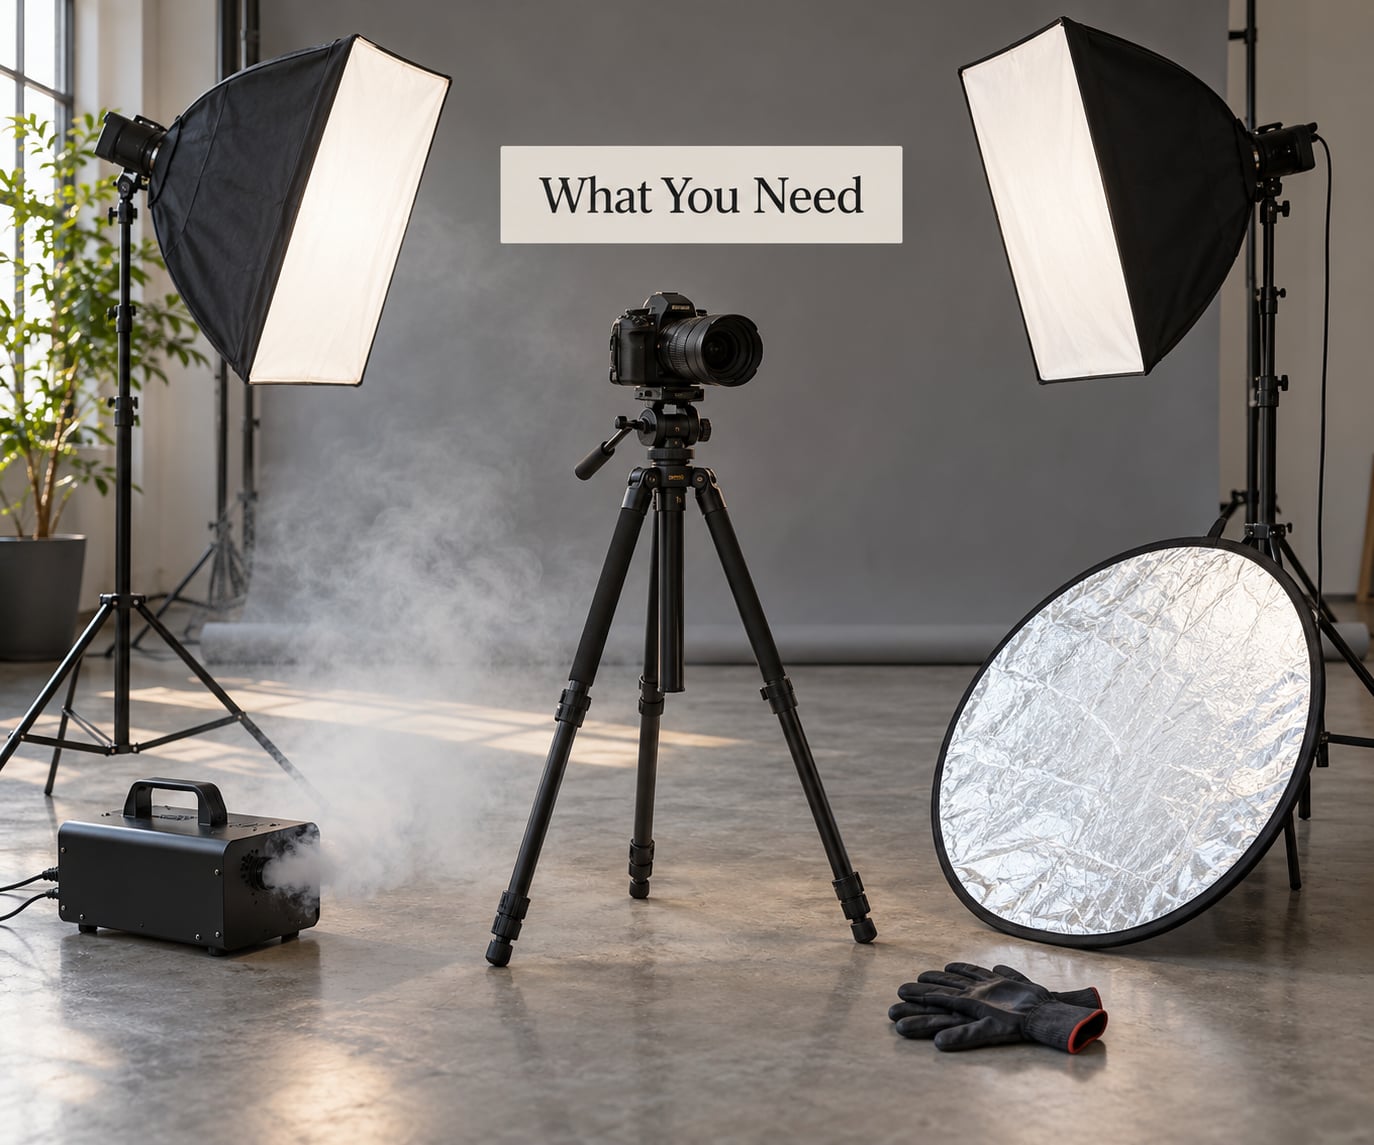
Start with the camera kit you already own. Any camera with manual control and a lens that goes to f/2.8 or wider will do the job. A tripod matters more than the body, because the fog keeps moving and you will want the frame locked while you adjust the atmosphere.
Lighting is where the effect lives. You need one hard, unmodified source aimed at the back of the frame, and one soft or diffused source for the face. A bare strobe with a snoot, a Fresnel, or a spotlight pointed at a wall will give you a clean beam. A large softbox or umbrella in front of the subject handles skin. That is two lights, and you can hang gels on both.
On the effects side you have four realistic options, and they are not interchangeable.
| Source | Colour control | Duration | Best used | Main limitation |
|---|---|---|---|---|
| Fog machine with water-based haze fluid | None of its own, gels control the colour | Minutes of continuous output once warm | Studio portraits, repeatable takes | Needs a warm-up period and a room that can be ventilated |
| Dry ice in warm water | None | Per load, roughly 5 to 10 minutes | Low-lying floor fog, small rooms | Heavy handling, cold vapour near the subject, ventilation needed |
| Coloured smoke bomb, canister or stick | Fixed colour per unit | 30 to 90 seconds per unit | Outdoor portraits, editorial colour looks | Combustion, wind dependence, no rewind |
| Steam from a kettle or similar | None | Constant while water is hot | Tests, practice, very cheap stand-ins | Too thin for most real setups |
That table is the decision most people get wrong. Foggers give you control and repeatability, which is what a portrait session needs. Bombs give you colour and drift, which is what an outdoor editorial needs. Dry ice gives you fog that hugs the floor, which is what a dance or product shot needs.
You also need something to move air. A foam core board or a reflector held just out of frame redirects fog away from the face. A small battery fan gives you a consistent push and is far easier to work with solo. If you have a second person, that person is your single most valuable asset, and every working shooter I know treats the fog handling as a real job role rather than something the photographer does between takes.
Finally, the safety kit: nitrile gloves, safety glasses for handling fluid, a spare reservoir, and a clear exit path. Add a towel and a plastic sheet you can lay under the machine. Small stuff, but it saves the floor.
How to Use Smoke and Fog in a Portrait Shoot: Step by Step
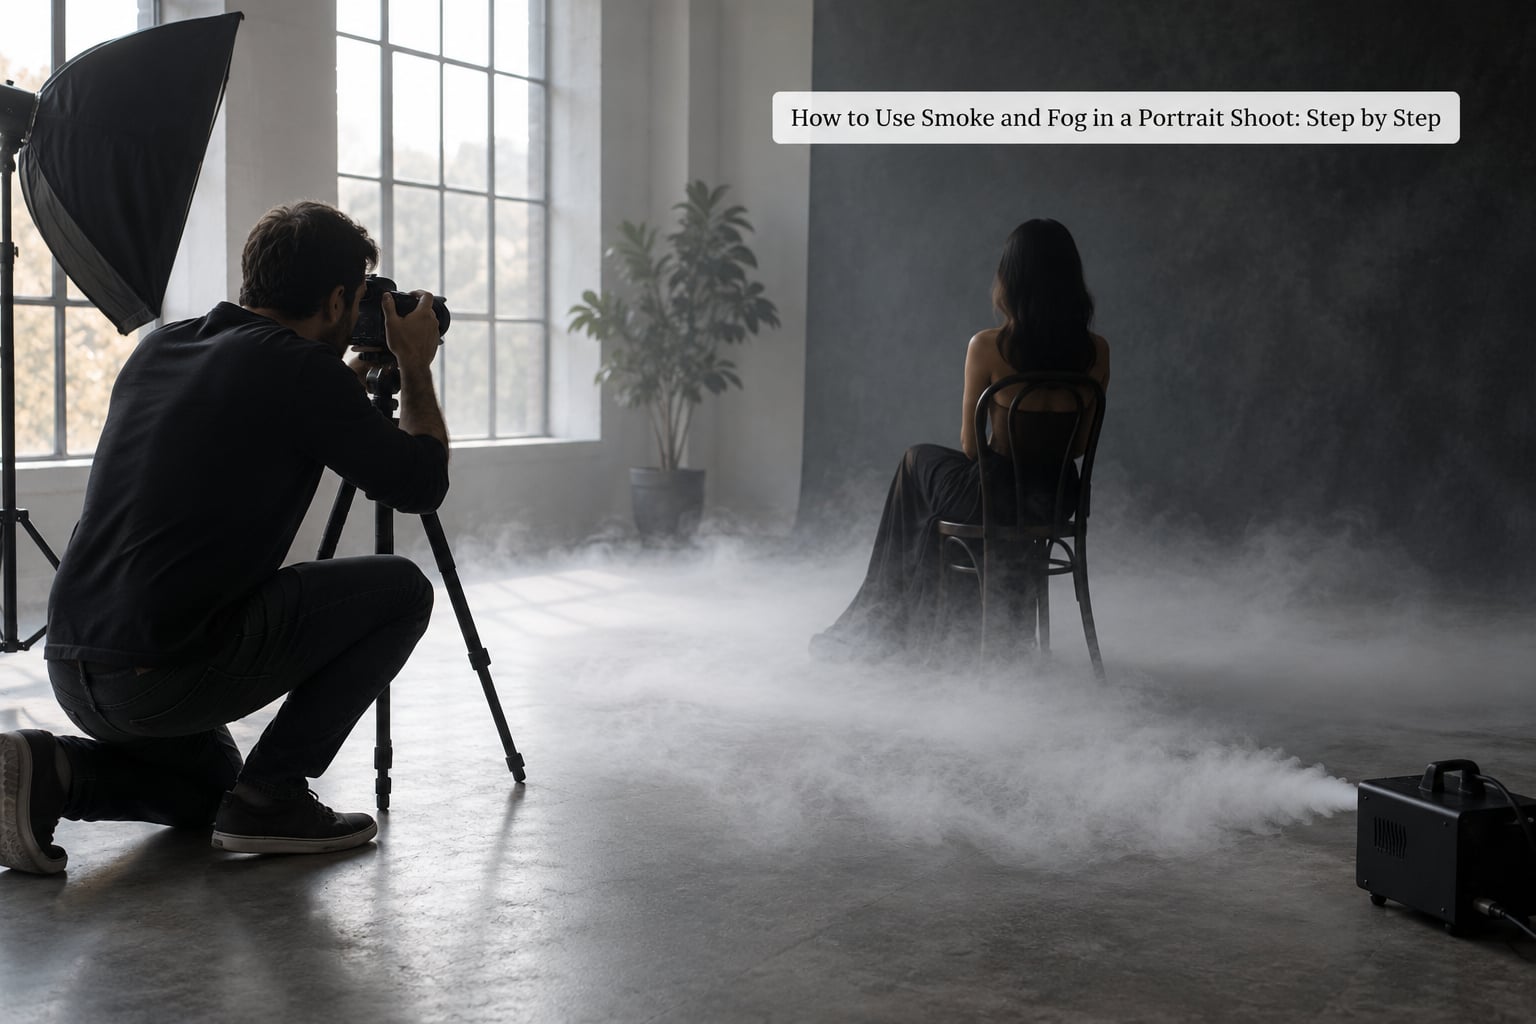
Plan the atmosphere before bringing in the smoke
Decide the look on paper before the model walks in. Write down three things: where the fog sits in the frame, how bright the face is relative to the smoke, and what the background is doing. If the answer to the third question is not a dark or black background, rethink it. Smoke on a white or mid-grey wall reads as dirt.
Choose between smoke and fog next. Fog from a machine is dense, cool and directionless, and it holds a shape for as long as the airflow allows. Smoke from a bomb is coloured, warm, and it rolls as it rises. Fog suits a moody or cinematic portrait where you want beams and depth. Smoke suits a styled editorial where colour is the point.
Set the lighting direction before anyone arrives, because fog is a waste of time without it. My default is a hard backlight from high and slightly off-centre, with the face filled softly from the front and a flag or black panel on the camera side to kill stray spill. That single arrangement gives you a rim, a visible beam, and a readable face.
Decide the background too. Black velour, a black seamless, or a wall you can light almost to zero all work. If you want beams, keep the light from hitting the backdrop directly, or the background will glow and swallow the contrast you built.
How to Use Smoke and Fog in a Portrait Shoot: Create the right density
Warm-up time is the thing that catches people out. A heater-based fogger needs several minutes before it produces anything useful, and the first output is thin and unpredictable. Switch it on, then set up lighting, then meter, then call the model. If you reverse that order you will spend the session waiting for the machine.
Once it is producing, add fog in short bursts rather than one long blast. Pulse it, walk into the frame, take a test shot, and adjust. Density is judged against your background: if you can still read the wall texture clearly, the fog is too thin for beams; if the far edge of the set is invisible, it is too thick for a portrait and the face will start to look soft.
Control movement next. Indoor air is still enough that fog drifts slowly, which is workable. Outdoors, even a light breeze will pull a thin layer apart in seconds, so you will need heavier output and a tighter frame. The usual trick outdoors is to place the bomb or fogger downwind so the smoke moves across the frame in a controlled direction rather than straight at the lens.
Keep the face clear. Position the fog source behind the subject or off to one side, never between the lens and the model. If fog creeps forward, put the fan on low and aim it past the subject’s shoulder, away from the face. Test this before the model arrives by putting a stand-in in the exact position and shooting with it.
Shoot a test frame with the actual camera and the actual lens before anyone is in position. Check that the beams register, that the face is not sitting inside the thickest part of the fog, and that no bright spot behind the subject is blowing out.
Light the fog for depth, not obstruction
Hard light makes smoke visible. Soft light makes it disappear. That is the whole principle: a diffused source scatters in every direction and you get an even grey wash, while a hard, focused source pushes light forward through the fog so the beam is bright against a dark background and the particles in front of it read as texture.
Two lights cover almost every case, and three gives you more control.
| Light | Position | Type | Ratio to face | Job |
|---|---|---|---|---|
| Key backlight | High behind subject, offset 30 to 45 degrees | Hard, snoot or grid, undiffused | 2 to 3 stops over the face | Reveals the fog and draws the rim |
| Face light | About 45 degrees off camera axis, slightly above eye line | Soft, large source | Sets the base exposure | Holds skin tone detail |
| Kicker or rim | Low and behind, opposite the key | Hard, medium size | 1 to 2 stops under face, or matched | Separates hair and shoulders from the background |
| Background light | Aimed at a wall or scrim | Grid or barn doors | As low as possible | Optional haze glow and separation |
The backlight should sit two to three stops brighter than the face. If you can see the source in frame, bring it down a stop. If the fog reads as a faint grey veil, bring it up.
A snoot or grid on the backlight narrows the beam so it cuts through the fog instead of lighting the whole room. A gobo with cut-outs projects patterns into the haze, which is the fastest way to make a plain studio look designed.
Control the front. A black panel or flag on the camera side stops the face light bouncing off the fog back into the lens, which is the usual cause of a flat, milky result. A small reflector under the chin can fill shadows without you adding another source.
Colour comes from gels, not from the fluid. A single gel on the backlight tints the beam while leaving skin tone neutral, which is the cleanest approach. Gelling both the backlight and the face light pushes skin toward the colour, and that is a deliberate stylistic choice rather than a default.
Expose for the face and check the background
Set exposure on the skin, then check what the fog is doing. A backlit fog scene tends to overexpose the beams, and pulling down to protect the highlights will darken the face, so balance it with fill rather than with exposure compensation.
| Look | Shutter speed | Aperture | ISO | Notes |
|---|---|---|---|---|
| Frozen smoke | 1/200 s or faster | f/2.8 to f/4 | 400 to 800 | Sharpest texture, safest with fast-moving smoke |
| Dragged smoke | 1/4 s to 1/15 s | f/8 | 100 to 200 | Use a tripod and a rear or bulb exposure |
| Soft glow | 1/125 s | f/1.8 to f/2 | 400 | Shallow depth, wide aperture, subject must be very still |
Flash duration matters more than shutter speed when you use strobes. A strobe that fires for a few thousandths of a second freezes the particles in mid-air, which is what you want for texture. Ambient light with a slow shutter will smear the smoke into streaks no matter how fast the frame rate is.
If the fog blows out, underexpose by half a stop to two thirds of a stop and lift the face with fill flash rather than ISO. Keep the white balance fixed rather than auto, or the camera will chase the colour of the beams and shift skin tone from frame to frame.
Check the background on every test frame. A hot spot behind the subject’s head, a light stand catching the edge of the beam, or a bright ceiling bounce will all pull attention away from the face. Flag anything that flares, and kill it before the session rather than in post.
One more habit: shoot the background alone, with the subject out of frame. If the empty frame is clean and dark, the fog is doing its job and the portrait will hold together.
Work safely with smoke and fog
Ventilation first. A fog machine in a closed room will raise the particle count until everyone is uncomfortable, and the fog will not clear on its own. Keep a door open, run a fan low against the wall, and give the room ten to fifteen minutes after you finish. If the space is small enough that ventilation is a problem, work outdoors or skip the effect.
Fire alarms are a genuine issue, not a myth. Photoelectric smoke detectors and many heat detectors will trigger on dense fog. Check with the venue before you start, tell whoever is supervising the room, and keep the machine away from any detector. If you cannot confirm the alarm system, assume it will go off.
Place the machine so the output blows away from the subject’s face and toward a wall or an open door. Keep it off the floor if it can sit on a small stand, so the fluid does not leak, and keep the reservoir upright and closed when it is not in use.
Electronics do not like fog. Oil-based fog fluid leaves a film on everything and can permanently mark some surfaces, so water-based fluid is the safer default for a studio with lights, computers, and a decent camera in the room. Cover stands and light housings, and give the room time to settle before you pack up.
Tell the model what is coming. Most people are fine with thin haze once they know it is part of the shot, and a few are not fine with it at all, particularly anyone with asthma. Fog is a smell-free aerosol, but it can irritate lungs and it settles on skin and hair. Have water available, keep sessions short, and offer breaks. If someone asks you to stop, stop. That is not negotiable and there is no shot worth it.
Combustion devices need more respect than a fogger. Work outdoors, away from people, buildings, dry vegetation and vehicles. Keep spares, do not reheat a spent canister, and follow your local rules on where pyrotechnics are permitted. If a venue or a client has any restriction at all, the fogger is the answer.
Follow your local safety guidance and the manufacturer’s instructions for whichever product you are using. Where a venue has an event safety plan, that plan comes first.
Common Mistakes
Almost every disappointing fog portrait comes down to one of these.
Fog between the camera and the subject. This is the big one. Any haze in the camera-to-subject path lowers contrast, softens edges and eats colour. Move the source behind the subject or to the rear third of the set.
A bright background. Fog on a white wall looks like a smudge. Use black or drop the background to near zero, and keep beams off the backdrop.
Soft light everywhere. Diffused sources make fog invisible. Put at least one hard, focused source behind or beside the subject.
Too much fog. Past a certain density the face starts to glow flatly and the background vanishes into grey. Pulse the output, shoot a test, and come down more often than you think you need to.
Not enough fog. If you can see the set clearly, the beams will not form. Add short bursts and check against a dark background rather than judging by eye in a bright room.
Waiting for the machine on set. Turn it on, build the lights, meter, then call the model. Warm-up delay is the most common complaint about fog machines and it is entirely a scheduling problem.
Ignoring air movement. A fan pointed at the face ruins the shot. Point it across and behind the subject, and use a board or reflector to block fog from drifting forward.
Leaving the fog in the room between takes. Density builds silently until everything goes milky. Open the door between setups, run the fan, and start each take from a known base.
Muddy colour. Gelling everything at once, or gelling the face light, gives you coloured skin. Gel the backlight only and let the face stay neutral unless the colour is the point.
Slow shutter without a tripod. Dragged smoke needs a locked camera. Without one you get camera shake, not atmosphere.
Faking it in post and it looks plastic. Painted-on smoke has an edge and a texture that never matches real haze. If you cannot get real fog, dial the effect back rather than pushing opacity. A soft glow built from dodging and burning reads far better than a mask that looks pasted on.
Two smaller notes. Make sure wardrobe and hair are prepared: dark, matte fabrics catch less light than silk, and styled hair stays presentable longer when you keep the fog away from it. And run a short practice session with a stand-in before the real one, because the hard part of this technique is capturing the smoke, not producing it.
Frequently Asked Questions
How do I get smoke to show up in photos?
Backlight it with a hard source, shoot against a dark background, and put the smoke behind or beside your subject rather than between them and the camera. Soft, diffused light makes smoke vanish, so use a snoot, grid or Fresnel aimed into the fog from behind and above. Set the backlight two to three stops over the face, freeze the particles with a strobe or a shutter speed of 1/200 s or faster, and underexpose slightly if the beams start to clip. Test with a stand-in before the model arrives, because fog drifts while you are still adjusting settings.
Is fog machine smoke bad for your lungs?
Water-based haze fluid produces an oil-free aerosol with no strong smell, and short sessions in a ventilated room are generally fine for most people. It can still irritate lungs, throat and eyes, and people with asthma or existing respiratory conditions may react more strongly. Tell your model what is happening before you start, keep the density low, work with a door open or a fan running, and take breaks. If anyone coughs or asks you to stop, stop. Never use a fogger in a small sealed room with people in it.
Will a fog machine set off smoke alarms?
Yes, it can. Photoelectric smoke detectors and many heat detectors are triggered by dense airborne particles, so a fog machine in a closed room can set off an alarm. Ask the venue before you start and let whoever is supervising the space know you are running one. Keep the machine away from any detector, aim the output away from the ceiling, and keep doors open to reduce density near the ceiling. If you cannot confirm the alarm type, assume it will trigger and have a plan for stopping quickly.
Is it safe to use a fog machine indoors?
It is safe when you plan for it. Choose water-based fluid rather than oil-based, since oil leaves a film on lights, stands and cameras. Keep the machine upright on a small stand, aim the output away from the subject’s face and toward an open door, and run a fan low against a wall to move air. Keep the room ventilated throughout and for ten to fifteen minutes afterwards. Cover electronics where you can, wear gloves and eye protection when handling fluid, and check with the venue first.
Is fog bad for electronics?
Dense fog is not good for electronics, mostly because of residue rather than damp. Oil-based fluid leaves an oily film on light housings, stands and camera bodies that is hard to remove and can mark some surfaces. Water-based fluid is much safer in a studio. Keep the machine away from your gear, cover anything you cannot move, and let the room settle before you pack up. Wipe down stands and light housings with a dry cloth afterwards rather than spraying anything near powered equipment.
Do fog machines work outdoors?
Only in the right conditions. Even a light breeze will pull fog apart within seconds, so outdoors you need higher output and a tighter frame. Place the source downwind so the fog moves across the frame in a controlled direction rather than toward the lens, and have a second person manage the airflow. Still, warm, calm early morning air gives the best results. For coloured smoke outdoors, check the wind forecast before you commit, since the smoke follows the same rules and you cannot control it once lit.
If you only remember one thing from this, do this: black background, hard backlight, fog behind the subject, test with a stand-in before the model arrives. Those four choices account for most of the difference between a fog portrait that works and one that just looks hazy. Once the placement is right, the rest is exposure and patience.