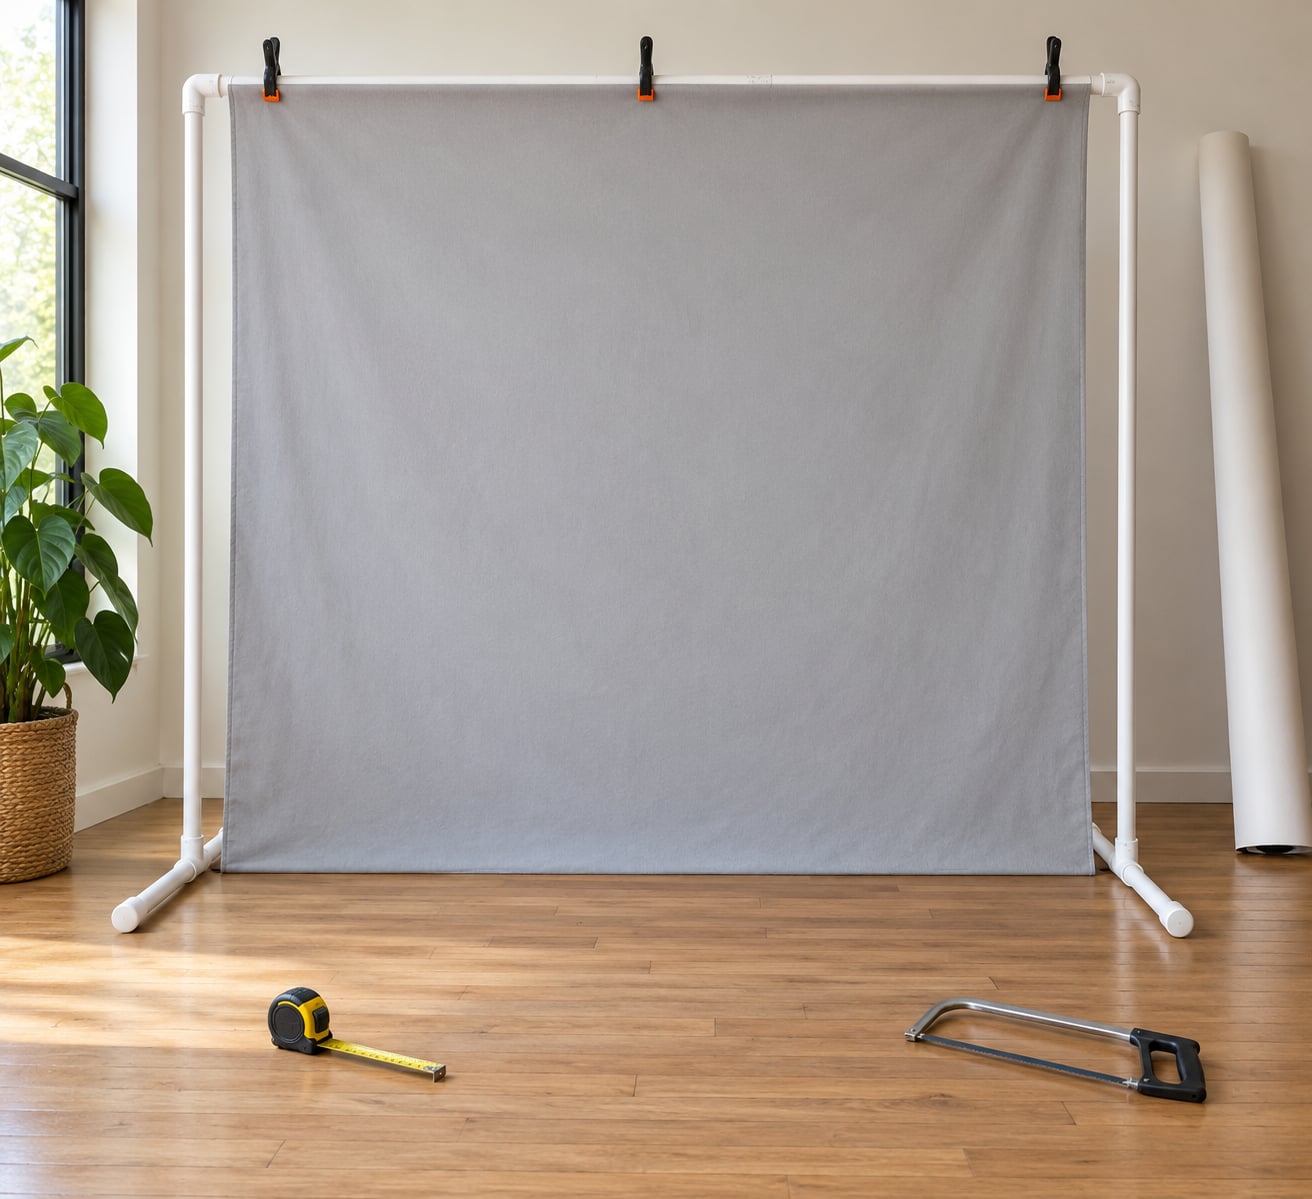
You can build a DIY backdrop stand from lightweight PVC pipe and a handful of fittings in under an hour, with no carpentry experience and nothing more exotic than a hacksaw. Two vertical uprights carry a top crossbar, the backdrop hangs from that bar, and a braced base keeps the whole thing upright while a subject stands in front of it.
I shoot a lot of newborn and family sessions in rooms that have no usable wall behind the sofa, which is exactly the situation a portable frame solves. Build it once, break it down flat, and it handles everything from a cake smash to a full-body portrait to a video call backdrop.
What You Need
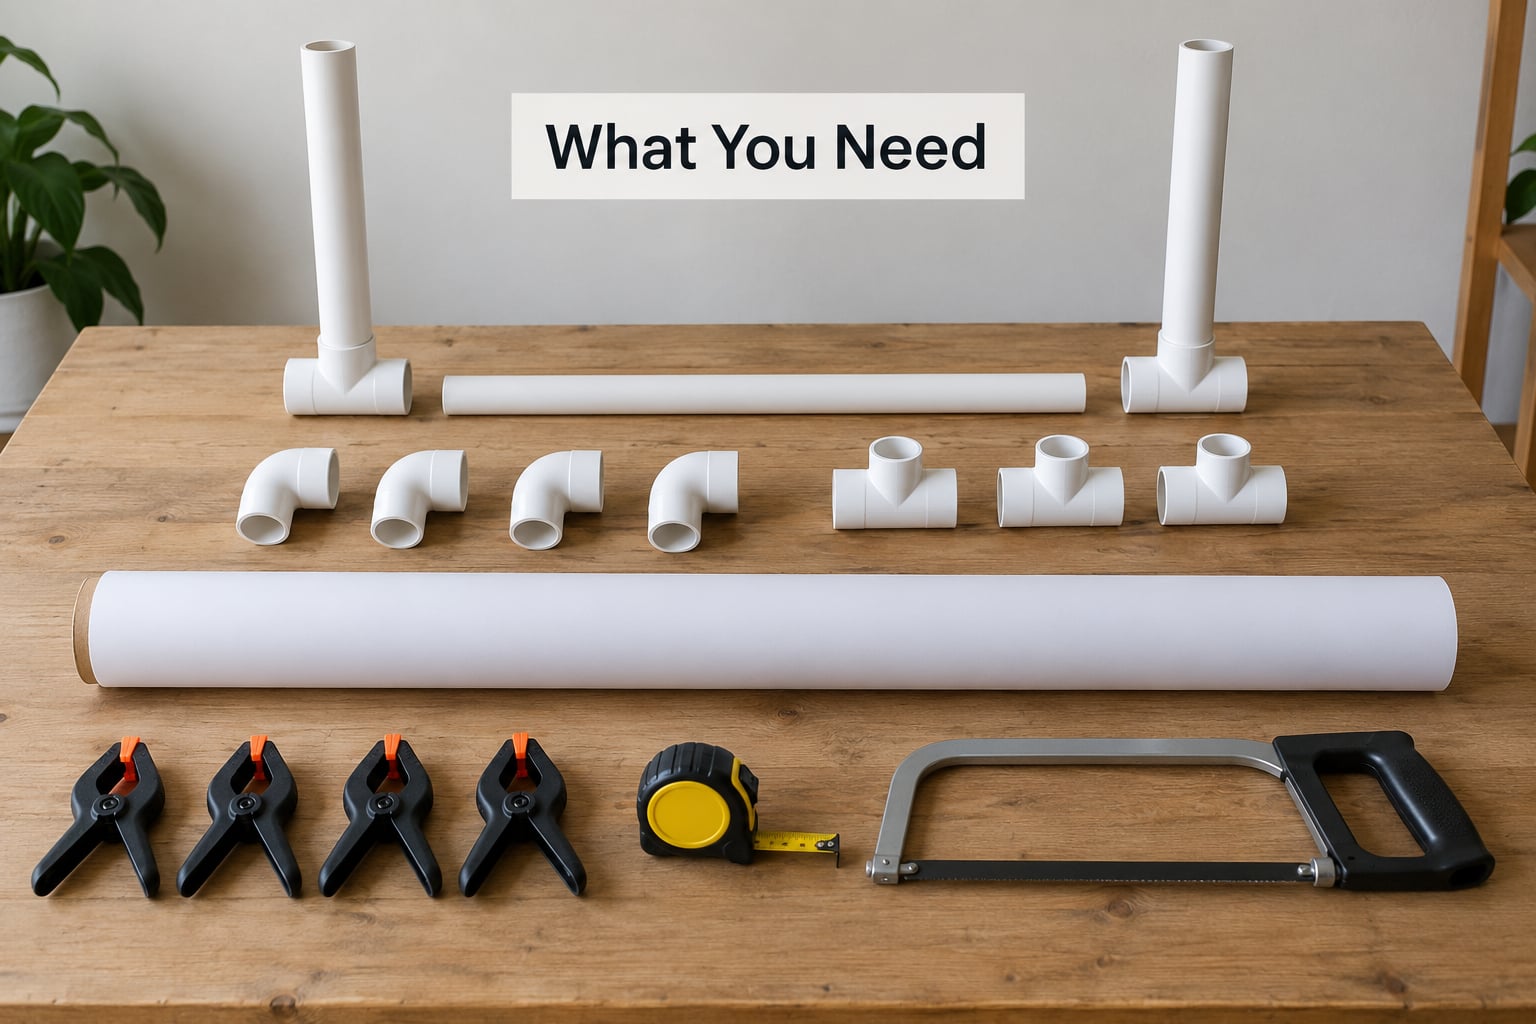
Start with 3/4 inch PVC pipe rather than 1/2 inch. The thinner pipe bows under the weight of a wide fabric drop, and a bowed crossbar is the single most common reason a homemade stand ends up in the bin after one session.
- Pipe: six lengths of 3/4 inch PVC, ideally in 10 foot sections so you can get multiple cuts out of each length.
- Fittings: four 3/4 inch 90-degree slip elbows, four 3/4 inch slip tees, and four 3/4 inch end caps to close the open legs.
- Optional but useful: two more slip tees if you want a centre support on a wide stand.
- Clamps: four to six spring clamps, or a set of clothes pegs if you are testing the fit first.
- The backdrop: a fabric drop, muslin or a roll of backdrop paper, plus something to weigh the bottom edge.
You also need a measuring tape, a marker, and either a hacksaw or a PVC pipe cutter. Put on eye protection before you cut anything, and clear a floor space roughly the size of your finished stand before you start gluing pieces together.
If a store cannot supply side outlet elbows, that is common and not a dead end. A slip tee, a short 4 inch stub of pipe and a slip elbow do the same job in a T arrangement. Several builders have assembled their frame entirely from tees and elbows after finding the corner fittings unavailable locally.
Step-by-Step: Building the Frame
Step 1: Choose the Stand Design and Measure Your Space
A DIY backdrop stand is two designs in disguise: an A-frame, where the legs splay out from the top, or a crossbar design, where two straight uprights sit on flat bases and a horizontal bar bridges them. For portraits, the crossbar design is easier to build, wider, and steadier, because all the weight sits low.
Measure your room before you cut anything. You need the stand width plus roughly 3 feet on each side for you to move around with a camera, and you need to check that the top bar clears your ceiling. Headroom is the detail people miss.
Sizing by shoot type:
- Newborn and floor sessions: 4 to 5 feet of stand width, with the top bar at 3.5 to 4 feet.
- Head and shoulders: 5 to 6 feet wide, top bar at 6 feet.
- Full body, single subject: 6 to 7 feet wide, top bar at 7 to 7.5 feet.
- Family groups: 8 feet wide with a centre support, top bar at 7 feet.
Any stand wider than 7 feet needs a vertical centre post running from the crossbar to the floor, or the middle of the bar will dip under load.
Step 2: Cut and Prepare the Frame Pieces
Mark every cut with a tape measure and marker before you saw anything, then cut on a flat surface with a saw braced against a bench. For a 6 foot wide by 7 foot tall crossbar stand, this is the cut list:
- 7 ft, quantity 2: vertical uprights.
- 6 ft, quantity 1: top crossbar.
- 3 ft, quantity 2: base connectors under the uprights.
- 2.5 ft, quantity 2: feet running out from each upright.
- 1.5 ft, quantity 2: elevated base support, which is the anti-tip brace.
A hacksaw cuts cleaner than a ratcheting PVC cutter for this job. Cutter blades leave a raised rebate ring at the cut, and that ring is what makes slip joints bind up and refuse to come apart later. If you use a cutter, run a file or a scrap of sandpaper around the end until the pipe slides in with hand pressure alone.
No saw at all? Most hardware stores cut pipe to length at the service desk, usually for a small fee or free with your membership. Bring your marked lengths written down.
Step 3: Assemble the Uprights and Top Bar
Dry fit every joint before you push anything home. Slide the upright into the elbow and the crossbar into the other side, then check the frame on a flat floor and adjust until it sits square. Fittings set by hand can be twisted a degree or two into better alignment, and you cannot do that once a joint is tight.
Join the uprights to the top bar with 90-degree elbows, or with a tee plus a 4 inch stub if corner fittings are hard to find. Keep the drop to whichever side you plan to shoot from and mark it, because flipping the frame later is how assembled stands end up crooked.
Test the joint strength the easy way: hang an empty sandbag or a bag of sand from the bar and push sideways on the top of the frame. If the joint rotates, add a short diagonal brace of offcut pipe between the upright and the bar. No cement, no glue, no drilling.
Step 4: Add Feet and an Elevated Base Support
Most homemade stands tip because the uprights only meet the floor at one point. A tee at the base gives you an L shape, which is easy to push over the moment a child leans on it or a gust of wind gets behind the fabric.
The fix is an elevated brace. Run a short support from the middle of the upright, well above the floor, down and out to a joint on the foot pipe. That turns the base from a single point into a triangle, and a triangle does not tip.
For a wider stance, angle the feet outward rather than straight down, and add a horizontal pipe running between the two feet near floor level. On sand, grass or a hard venue floor, hang weight on the lower bar: sandbags, a belt with gear, or a couple of filled water bottles. Keep the weight low and centred, not high, where it raises the centre of gravity and makes things worse.
Step 5: Attach the Backdrop
Work out the tension before you clamp anything. A fabric drop that is pulled sideways will drag the top bar over, and a drop that is too loose will show every crease under a hard key light.
Hang from the top bar with spring clamps every 12 to 18 inches, starting at one corner and working across. Pull each clamp toward the outside edge of the bar rather than straight down, which spreads the fabric and pushes ripples to the middle. Many builders simply drape the fabric over the bar and clamp the two hanging sides instead, which halves the number of clamps you need.
For paper, clamp the top edge and let the roll run down past the floor, then weight the bottom with a batten, a length of timber or a bag of beans in a pillowcase so it cannot curl up into the shot. For fabric, tension it evenly and trim any edge that pools on the floor. Sweep the floor in front of the backdrop, and any scuff marks or loose threads become obvious immediately.
If you are working out how to build a DIY backdrop stand for portrait photos rather than video, keep the fabric one shade lighter than your subject or one shade darker, never the same. Fabric that matches skin tone flattens the face.
Step 6: Test and Adjust on Location
Before anyone sits down, stand in the spot where the subject will be and check three things: the backdrop is vertical and flat behind the shoulders, you can walk a full circle without catching your foot on the base, and the top of the frame is not intersecting your light stands.
Wobble test first. Push the top bar gently and watch whether the base lifts on one side. If it does, widen the feet or add the horizontal floor pipe before you hang any fabric.
Lighting test second. Set your key light roughly 45 degrees from the subject and stand further back than feels natural, because a close key throws a shadow of your subject onto the backdrop. If a shadow appears, either move the light further round, raise it, or add a second light behind and to one side of the camera to wash the backdrop out.
Adjusting height on the same frame is just a matter of adding or removing pipe above the top bar. Builders who shoot both newborn sessions and adult portraits often add a set of 1 foot extensions with a tee on each upright, so no stool is ever needed on a job.
Common Mistakes and How to Fix Them
The joints will not come apart later. Usually caused by cutter rebates or by glue. File the pipe ends smooth, assemble dry, and disassemble by twisting rather than pulling. If you did cement anything, a mallet and a cloth wrapped around the fitting protect your hands and your pipe.
You grabbed the wrong diameter. Bins of fittings get mixed and a 1/2 inch elbow will not seat on 3/4 inch pipe. Check the stamped size on the fitting body before you buy, and if you are already home, a short length of 1 inch pipe with a coupling on each end will rescue mismatched pieces.
The crossbar bows in the middle. Either the pipe is too thin, the span is too wide, or there is no centre support. Go up a diameter, shorten the span, or drop a vertical post from the middle of the bar to the floor.
It tips when a subject leans on it. Add the elevated brace from Step 4 and lower the weight. Sandbags on the foot pipes do more than anything hung on the top bar.
Wrinkles in the finished frame. Fabric was hung slack or the drop is narrower than the stand. Buy fabric at least twice the finished width you need, and tension by pulling outward at each clamp rather than downward.
Ten foot pipe will not fit in the car. Cut your lengths before you leave the store rather than after you reach home. A frame that breaks down into pieces under 7 feet fits in almost anything.
Frequently Asked Questions
What materials are best for a DIY backdrop stand?
3/4 inch PVC pipe with slip elbows, slip tees and end caps is the most practical combination: light, inexpensive, tool-free and it breaks down flat for transport. Four fittings of each type cover a 6 foot wide frame. 1 inch PVC is stiffer and worth it if you hang heavy muslin or shoot wide group portraits every week.
How wide should a backdrop stand be for portraits?
Plan about 4 to 5 feet of width for newborn and floor sessions, 6 feet for head-and-shoulders or a single full-body subject, and 8 feet with a centre support for families. Always add roughly 3 feet of clear floor on each side so you can move around the subject without tangling with the base.
How do I stop a DIY backdrop stand from tipping over?
Run a short elevated brace from the middle of each upright down to the foot pipe, turning the base into a triangle rather than a single pivot point. Widen the stance by angling the feet outward, join the feet with a horizontal pipe near the floor, and hang weight low on the base for sand, grass or rented venues.
Can I use a backdrop stand outdoors?
Yes, but weight the base heavily and watch the wind. A wide fabric drop acts like a sail, and a frame that is stable indoors can be knocked flat by a gust on an open lawn. Sandbags on both foot pipes, a sheltered spot behind a wall or vehicle, and taking the backdrop down in wind are the three things that keep it upright.
How do I attach a fabric or paper backdrop to the frame?
Clamp the top edge every 12 to 18 inches with spring clamps, or drape the fabric over the top bar and clamp both hanging sides. Pull each clamp toward the outer edge of the bar rather than straight down to spread wrinkles outward. Let paper run past the floor and weight the bottom edge so it cannot curl.
Is a PVC backdrop stand strong enough for photography?
For portraits, yes, at 3/4 inch or larger. The load is light: a fabric drop plus clamps plus occasional leaning. Pipe only becomes a problem at very wide spans, where the middle of the bar sags, or when thinner 1/2 inch pipe is used on a long upright, so check both before you start.
Conclusion
The shortest reliable path is the crossbar design: two uprights on braced feet, one top bar, and an elevated brace on each base. Cut everything with a hacksaw, file the ends smooth, and dry fit the whole frame on the floor before you clamp a single piece of fabric to it.
Your first measurement decides everything else. Measure the room you plan to shoot in, check the ceiling height, and add your working clearance on both sides. Once you know the width and height that space allows, the cut list falls out of it in five minutes and the rest is assembly.