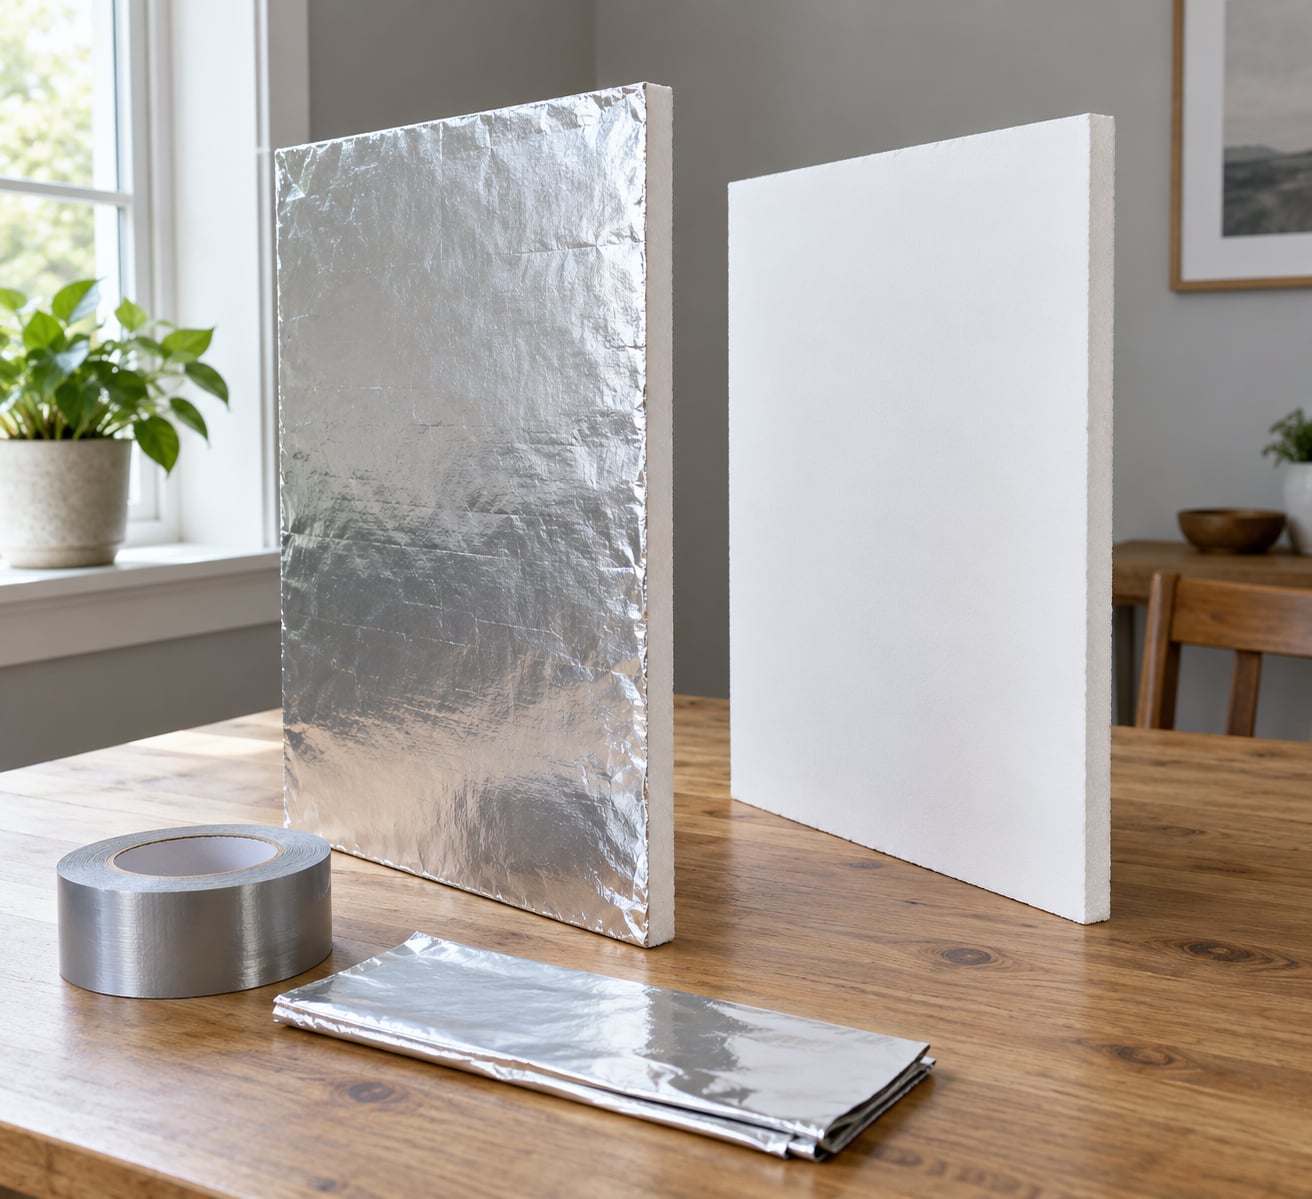
Cut a sheet of foam board, cover one face with aluminum foil or leave it white, tape the edges, and you have a reflector that bounces your key light back into the shadow side of your subject. To learn how to make a DIY reflector from foam board well, budget about half an hour of building time and keep the whole panel under a foot square for portraits.
A reflector returns light you already have instead of adding a second source. That single fact is why one flat piece of board fixes the flat, dark look most beginners get from window light or a speedlight.
Table of Contents
- What You Need
- How to Make a DIY Reflector from Foam Board in Six Steps
- How to Make a DIY Reflector from Foam Board
- Common Mistakes
- Frequently Asked Questions
- What is the best foam board for making a reflector?
- How large should a DIY reflector be for portraits?
- Can I use aluminum foil instead of a photography reflector?
- What side of the reflector should face the subject?
- How do I keep a foam board reflector from bending?
- How close should the reflector be to the subject?
- Conclusion
What You Need
Every item on this list is ordinary. Nothing here needs a special order, and the total shopping trip is one aisle in a craft store plus a hardware stop.
| Item | Quantity for a portrait reflector | Where to find it |
|---|---|---|
| Foam board or foam core, 3 mm thick | One 20 x 30 inch sheet, or two 16 x 20 inch sheets | Craft store art aisle; home improvement insulation aisle for the large 4 x 8 sheets |
| Aluminum foil, matte finish | About 2 feet of 18 inch wide roll, or two sheets | Grocery store foil aisle |
| Spray adhesive or self-adhesive contact paper | One small can, or one sheet of shelf liner | Craft store adhesive aisle |
| Gaffer tape or packing tape | One roll, 2 inches wide is plenty | Hardware store; gaffer tape is the better choice because it peels off cleanly |
| Utility knife with fresh blades | One knife, spare blades | Hardware store |
| Metal ruler or straightedge | One, long enough to span the cut | Any craft or school supply shelf |
| Alligator clip or spring clamp | Two, for mounting | Hardware store |
Skip the foil entirely if you want the gentlest possible fill. A plain white foam board panel reflects roughly half as much light as foil, but the light it returns is softer and far easier to control, which makes it the better starting point for a beginner shooting indoors.
How to Make a DIY Reflector from Foam Board in Six Steps
- Pick your board size and confirm the thickness is at least 3 mm.
- Measure and mark it, then cut with a sharp utility knife and a straightedge.
- Lay aluminum foil on the reflective face, matte side out, and smooth it flat.
- Trim the foil to leave a clean border and fold the edges over the board.
- Reinforce all four edges with gaffer tape or packing tape.
- Hold or mount it on a light stand, clamp, or angle it against a wall next to your subject.
How to Make a DIY Reflector from Foam Board
Choose the Foam Board Size
Size the board to the light you need to fill, not to the light you wish you had. A panel that covers the shadow side of your subject’s face does the work; anything larger only adds weight to carry.
| Shooting situation | Board size | Notes |
|---|---|---|
| Tabletop, food or macro | 8 x 10 inch | Fits in a camera bag pocket, folds in half for a pocket reflect card |
| Head and shoulders portrait | 12 x 16 inch | Covers one side of the face and both eyes from a typical position |
| Half-length or full-body portrait | 20 x 30 inch, or two 16 x 20 inch sheets taped together | Add an arm’s length from the subject or the fill falls off too quickly |
| Small studio or group shot | 4 x 8 foot foam insulation board | Build a frame and get a second person or a stand to hold it |
Measure your actual setup before you cut. Have someone stand where your subject will stand, then check whether the board covers the shadow side without crossing into the camera’s view. Thickness matters more than people expect: anything under about 3 mm bows in the middle and produces a wavy reflection, and expanded polystyrene foam beads give a bumpy, dim surface.
Cut the Foam Board to Shape
Measure twice and cut on a flat, hard surface. A folding table or the floor works; a bed or a lap will give you a slight curve that ruins the panel.
Score the line first with the knife held at a shallow angle, then deepen it with several passes held at 45 degrees. Let the blade do the work rather than your hand.
Run the blade along the metal ruler in one continuous pull. Backtracking tears the paper facing and crushes the foam underneath, and that crushed patch shows up later as a dull streak in the reflection.
Cut a few millimeters smaller than your target size if you plan to wrap foil around the edges. Trimming later is far easier than fighting overhanging material once the panel is covered.
Attach the Reflective Surface
Spray adhesive onto the foam face in a light, even coat, wait about the length of a coffee break for it to go tacky, then lay the foil down from one edge and smooth toward the other with a flat tool.
Use the matte side of the foil facing out. Shiny foil creates specular reflection, meaning it throws a hard mirror image back at you. That is where hot-spots come from: bright dots and rippled streaks that look like reflections in cheap plastic.
Crumple the foil, then flatten it back out with your palms before you stick it down. The crumple-then-smooth trick breaks up the mirror finish while leaving the panel visibly flat, and it costs about twenty seconds.
For a two-sided panel, cover one face with foil and the other with white paper, shelf liner, or nothing at all if the board itself is already white. A dark or black-painted face gives you negative fill, which is how you darken a side of the face rather than lifting it.
Two boards joined with paper hinges along one long edge give you a folding reflector that packs flat and stands up on its own when open. Leave a gap roughly the thickness of the board between them so the hinge can bend.
Make It Strong Enough to Use
Wrap the foil over the edges and tape all four sides. That tape line does more than tidy the border: it keeps the core from absorbing moisture and stops the facing from peeling when you grab the panel mid-shoot.
Avoid gripping the panel by the top edge. Carry it flat, or cradle the bottom two corners with one hand. A 20 x 30 inch panel will flex if you hold it like a tablet.
For holding, a light stand or C-stand with an alligator clip is the cleanest option. One commenter on diyphotography.net drilled a hole in the center of a board, ran an aluminum tube through it, and clamped the tube to a stand with a bolt and large washers on both sides, which is a solid version of the same idea.
Cheaper options work fine. A thrift-store IV stand makes a rolling reflector, a wire office file organizer holds a board at a low angle for tabletop work, and for macro shoots people simply stack books and prop the board against them. Leaning the panel against a wall or a door at roughly 45 degrees to the key light is the fastest setup of all.
Use and Position the Reflector
Start on the shadow side, opposite your key light, close to the subject. Move the reflector inward toward the camera axis for more fill and softer shadows, and swing it outward and away for more contrast.
Fill strength falls off fast with distance, so proximity is your main control. Halving the distance roughly doubles the light returned. A panel placed far away from your subject works about as well as no panel at all.
Watch for the hot-spot. Once the foil is on, take a test frame and zoom into the brightest part of the reflection. If you see hard-edged bright shapes rather than an even wash, flatten the foil further or turn the panel a few degrees away from the light source.
Outdoors, the same panel does double duty: bounce sun back into the face on one side and shade the subject with its back face on the other. In wind, angle the panel into the breeze and keep it low, because a large flat board behaves like a sail.
Test the Reflector Before the Shoot
Run one test frame with the panel out, then one with it in place, and compare at full zoom rather than on the camera screen.
Check four things: whether the shadow side lifted without going flat, whether any hot-spot appears in the cheek or eye, whether the white side of the panel shows up in the background, and whether the exposure needed to drop by much more than a third of a stop to hold the same brightness.
If the panel is too bright and the face now looks washed out, angle it away rather than pulling it back. Angling changes the direction of the bounce; distance changes its strength, and direction is the gentler control.
Common Mistakes
Hot-spots from wrinkled foil. Crumple the foil then smooth it flat, and face the matte side outward. Slight waviness at this scale reads as texture, while a sharp crease reads as a bright streak.
Board bowing in the middle. Thicker board is the real fix. Below 3 mm, add a strip of tape across the back at mid-span or mount the panel at its edges rather than the center.
Adhesive failing on the foam surface. Foam eats ordinary glue. Use spray adhesive designed for foam or polystyrene, or press the covering into place while the adhesive is still wet and tape the perimeter as it dries.
Yellowed or dingy white surface. A panel that has sat in a garage for a year will tint skin yellow-green. Cover that face with fresh white paper and the problem disappears.
Unstable handling. A leaning panel at an angle tips the moment someone steps on the far side. Clamp it, rest it on something solid, or hand it to a second person for the duration of the setup.
Oversized panel. A board twice the size you need is heavier, harder to hold, and often catches the camera’s edge. Cut to the smallest size that covers the shadow side.
Wrong side facing the subject. The unreflective back of a one-sided panel is a flat gray card, and it absorbs rather than returns light. Mark the reflective face with a small pencil dot near a corner so you identify it instantly on location.
Frequently Asked Questions
What is the best foam board for making a reflector?
Use foam core or self-adhesive foam board at least 3 mm thick. Self-adhesive board needs no spray adhesive, since the foil sticks straight to the liner. Avoid expanded polystyrene bead board: the bumpy surface scatters the reflection and dims it. Dense mounting board also works and is stiffer, though it is heavier to carry.
How large should a DIY reflector be for portraits?
A 12 x 16 inch panel covers the shadow side of a face for head-and-shoulders work. For half-length or full-body portraits, step up to a 20 x 30 inch panel or two 16 x 20 inch sheets taped together. Measure from the position your subject will stand in, and add distance to the panel’s far edge.
Can I use aluminum foil instead of a photography reflector?
Yes. Lay grocery-store foil on the board, crumple it and flatten it, then face the matte side out to avoid hot-spots. Foil returns more light than white board, roughly one to two stops, so it fills shadows faster but is harder to blend. Many photographers shooting indoors prefer plain white foam board for that reason.
What side of the reflector should face the subject?
The reflective side, which is the foil-covered or glossy face. A two-sided build gives you the choice: foil side for strong fill on a shadowed face, white side for softer wrap or a slightly brighter look. A dark painted face turns the panel into a flag for negative fill, which darkens a side instead of lifting it.
How do I keep a foam board reflector from bending?
Choose board at least 3 mm thick, then support it at the edges rather than the middle. Clamping a board by its center is what causes the bow, so attach clips near the top and bottom corners. Taping a strip across the back at mid-span also stiffens a thinner panel without changing its reflective surface.
How close should the reflector be to the subject?
As close as you can manage, generally within a foot of the shoulder or hip on the shadow side. Fill falls off quickly with distance, so proximity is your strongest control. Start close and swing the panel outward toward the key light when you want more contrast and a faster shutter speed.
Conclusion
Cut one sheet this week. A 12 x 16 inch panel of 3 mm foam board, one strip of matte aluminum foil and a roll of gaffer tape will get you through most portrait sessions, and you can compare results side by side the next time you shoot by a window.
Once the build feels routine, build a second one larger and pair the two so you have both a strong silver side and a soft white side. That is when a homemade reflector stops being a stopgap and starts doing the job of gear you would otherwise buy twice.