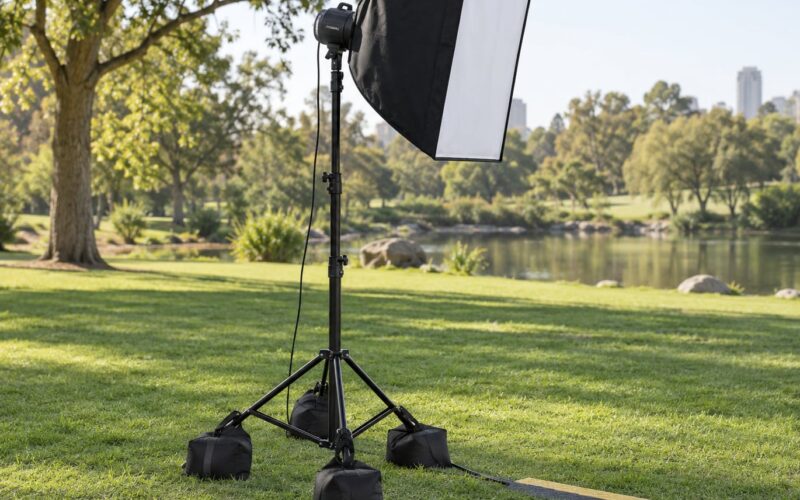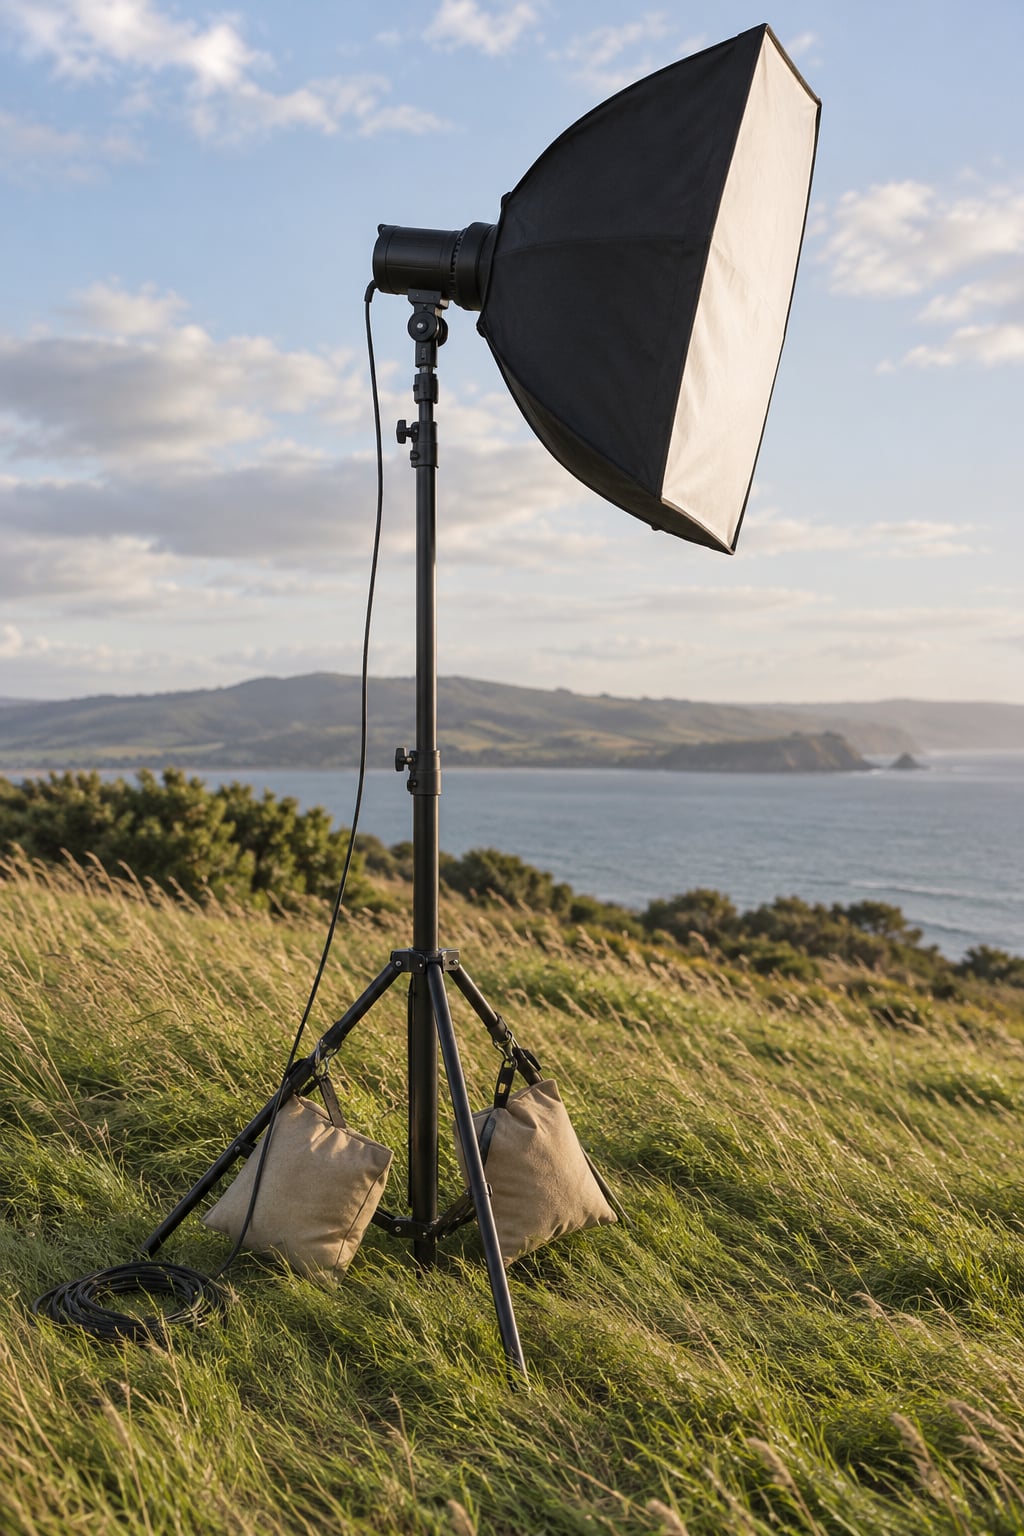
To sandbag lights on a windy day, you clip ballast bags onto the spreader legs of each light stand, one bag per leg, close to the floor, and you lower the stand so less of it is exposed. A bag hung on the center column instead does almost nothing. Weight low and wide is what stops a stand from tipping.
Wind pushes on the softbox, umbrella or reflector at the top of a narrow stand and tries to rotate the whole thing over. Sandbags widen the base and drop the center of gravity, so the sideways force has to work much harder to tip it. Get the weight in the wrong place and you will watch a strobe take a dive anyway.
What You Need
Most of this list is stuff you already own, or a cheap upgrade to a bag you already carry.
- Ballast bags. Two saddle-style sandbags (the pouch wraps around a leg with a fill pocket on each side) is the minimum for a three-leg stand. Saddle bags are easier to attach one-handed than a single hanging bag.
- Fill material. Sand, gravel, dry soil or plate weights. Sand from a hardware store is the standard choice; see the fill comparison below.
- A scoop or trowel and a few heavy-duty zip-lock bags if you are filling on site.
- Clips or pre-tied cord. Aluminum clips, a carabiner or a length of paracord looped permanently around each leg so nothing has to be tied in the wind.
- A stand you trust. Check the leg locks and the spreader collar before you load it. A stand with a worn collar fails regardless of ballast.
- Ground protection. Rubber base mats or stake plates for soft ground and turf.
- A weather check. A wind forecast app showing gust speeds, not just an average.
Step-by-Step: How to Sandbag Lights on a Windy Day
1. Check the Forecast and Set a Wind Limit
Read the gust number, not the average. A forecast reading of 12 mph average with 25 mph gusts will put a softbox over even a well-bagged stand, because the gust is the load that does the damage.
Decide your shut-down threshold before you unload the van, and write it on the call sheet. Manufacturers rate stands for wind, and the spec sheet usually lists a maximum wind speed at the stand’s own rated load. When the gust reading approaches that number, you come down. There is no shame in packing up; there is shame in explaining a cracked speedring to the venue.
2. Choose a Low-Exposure Location
Ballast is the backup, not the plan. Put the stand with a wall, a building or a vehicle between it and the prevailing wind whenever the lighting angle allows, and never in an open field just to keep the light where you originally wanted it.
Keep stands back from roads, from where guests walk, and from anywhere a toppling boom arm could land on someone. A sheltered corner on a patio will save you far more time than fighting a stand that keeps leaning.
3. Select the Right Sandbags
Every forum thread asks the same thing, how heavy do the bags need to be, and the honest answer is that most people carry too little. Use these minimums as a starting point and go up one step for open ground, coastal locations or anything above head height.
| Setup | Minimum per bag | Bags per stand | Total ballast |
|---|---|---|---|
| Small strobe head, no modifier | 5 lb | 2 | 10 lb |
| Strobe with 36 inch softbox or a small reflector | 10 lb | 3 | 30 lb |
| Medium softbox or an umbrella with a strobe | 15 lb | 3 | 45 lb |
| Two fixtures on one stand, or a stand over 8 ft | 20 lb | 3 | 60 lb |
| Backdrop stand with a 10 ft muslin or seamless paper | 20 lb per stand | 2 per stand | 40 lb |
One r/WeddingPhotography user runs two 5 lb plate weights inside each bag and 10 lb ankle weights on stands at receptions. Another puts 10 lb into each side of a saddle bag for a 20 lb bag and reports it noticeably damps the vibration.
Ballast weight beats bulk. A kit you will actually carry gets used, and a kit you dread carrying gets left in the van.
Choosing what goes inside. Pick fill by weight per volume, not by what is cheapest. Sand and gravel give you the most ballast for the least bulk, which matters when you are carrying six bags up a hillside.
| Fill material | Approximate weight per quart | Notes |
|---|---|---|
| Dry sand | about 1.5 lb | Cheap, widely available, shifts as it settles so re-pack during the shoot |
| Gravel | about 1.5 lb | Heavier feel, does not settle, can tear a thin bag |
| Dry soil | about 1.3 lb | Free if you are already on location |
| Rice | about 0.9 lb | Light for its volume, needs more bags |
| Water bottles | about 2.2 lb per liter | Easy to source, but a frozen or dropped bottle makes a loud mess |
| Plate weights | 5 lb and 10 lb plates | Accurate and compact; a favorite trick for reception stands |
| Ankle weights | 5 lb and 10 lb blocks | Strap straight onto a leg as a fast top-up |
For a DIY saddle bag, fill two zip-lock bags per pouch side and leave a little wiggle room so the pouch still closes, then cinch it with a carabiner or an aluminum clip. On a Photrio thread the popular suggestion was to buy supermarket plastic bags and fill them with sand near the location instead of hauling pre-filled bags, since shipping 20 to 30 lb bags costs a lot for the weight alone.
4. Protect and Inspect the Ground
Walk the spot before you raise anything. Spike feet sink in wet grass and pull the base out from under the ballast, so use rubber base plates or mats on anything soft, and check for buried irrigation lines before driving spikes in.
Never stand on frozen ground, thin ice or loose gravel. If you are indoors, put a rubber mat under the feet so a shifting leg cannot skate across the floor, and keep cables out of walkways.
5. Attach Sandbags to the Stand
Lower the stand first, then bag it, then raise it. Trying to clip a full bag onto a leg at eight feet is how people drop a bag on their foot.
Slide the saddle pouch over one leg just above the foot section, roughly 6 to 12 inches off the ground, and clip or loop it closed. Repeat on every leg. Weight goes on the spreader legs, not the center column, because the tipping force pivots around the leg spread.
Fill each pouch so it closes, but leave a little wiggle room so the bag can hang without the fastener straining. Then distribute the bags evenly, one per leg. An uneven load tips the stand toward the heavy side, which is exactly the wrong direction when the gust arrives.
Keep bags clear of hot fixtures. Tungsten heads and modeling lamps get hot enough to melt a fill bag, and a bag pressed against the lamp housing also blocks air cooling.
6. Test the Setup Before Powering the Light
Grab the light head or upper column and pull firmly in several directions. The stand should not move. If it slides, creeps or rocks, add another bag or drive the legs tighter before you connect any power.
Then push the stand gently from the side and confirm it would fall away from people rather than toward them. Route power cables down the center column and off to the nearest outlet or battery so nothing loose is left flapping. Only then turn the light on.
7. Monitor Wind and Adjust During the Shoot
Walk your stands on a timer, every fifteen or twenty minutes, and push-test each one. Look at the bags too, since a bag that has rotated around a leg quietly reduces the stand’s effective base.
When the wind picks up, the first move is always down: lower the light to head height or lower. If gusts keep climbing after that, power down, break down and move indoors or reschedule. A photographer on r/photography made the point that the camera bag itself works as an anchor, as long as it does not swing much in the wind. A swinging bag adds a moving load, not a stable one.
Common Mistakes and Quick Fixes
Hanging the bag on the center column. It adds weight but no width, so the stand still pivots on its legs. Move the weight down onto the legs.
One bag instead of one per leg. A single bag stabilizes one direction and leaves the others free. Use at least two, three for a heavy modifier.
Under-bagging a tall stand. Height multiplies the force. A stand at ten feet with a softbox needs far more ballast than the same stand at five feet. Drop the height before you add weight.
Leaving cables in the wind. Extension cords act as levers and snag on people. Secure them to the column or run them along the ground to the outlet.
Putting weight on a fragile base. Glass, tile, a deck edge or a rented dance floor will not take a dropped stand. Move to grass or bring mats.
Leaving the stand unattended. Nobody watches one stand for an hour and a half. If you cannot check it on a timer, take it down or put someone on it.
Ignoring movement. The moment a stand starts to creep in a gust, the ground or the ballast has failed. Fix it there, not later.
Trying to tape indoors only. One r/WeddingPhotography user keeps duct tape in the stand bag and tapes all three legs to the floor on smooth surfaces, which works well indoors but leaves a residue on some floors.
Frequently Asked Questions
How many sandbags does a light stand need?
Use at least one bag per spreader leg. Three legs means three bags, and that is the minimum for any stand carrying a modifier. A small strobe head with no modifier can get away with two 5 lb bags, while a medium softbox wants three 10 to 15 lb bags. Weight on the legs, not the center column.
How much does a filled sandbag weigh?
It depends on how full you make it. A typical saddle bag holds two zip-lock bags per side, and at about 1.5 lb per quart that lands somewhere around 10 to 20 lb per bag. Fill to the point where the pouch closes, and leave a little room so it still hangs correctly.
What else can I fill sandbags with besides sand?
Gravel, dry soil, rice, filled water bottles, plate weights or ankle weights all work. Gravel and sand give the most ballast for the least bulk. Plate weights are the most accurate and are a common trick at receptions, where a rig is set up fast and needs a known number of pounds.
What is the difference between a sand bag and a shot bag?
A sand bag is the larger ballast pouch, usually saddle style, that wraps around a light stand leg and holds fill material. A shot bag is a smaller, denser bag used to weigh down a boom arm, a grip head or a light head. Shot bags add weight where you need it without the bulk of sand.
How windy is too windy to shoot with strobes outdoors?
Watch the gust figure on your weather app, not the average. Once gusts approach the maximum wind rating listed for your stand, take the rig down. Lower the light to head height first, which cuts the force dramatically, and power down and pack up if gusts keep rising.
What are the main safety tips for a windy-day shoot?
Never leave a stand unattended in gusting conditions, keep stands away from traffic and public areas, and confirm a toppling stand would fall away from people. Walk your stands on a timer, power down before you dismantle, and follow the wind rating in your stand’s manual rather than testing it.
The first thing to do is decide your gust limit before you unload anything, then pick the most sheltered spot your lighting plan will allow. From there it is mechanical: one bag on every leg, low down, evenly distributed, and a push test before you power up. Lower the stand whenever the wind rises rather than adding weight you cannot carry.