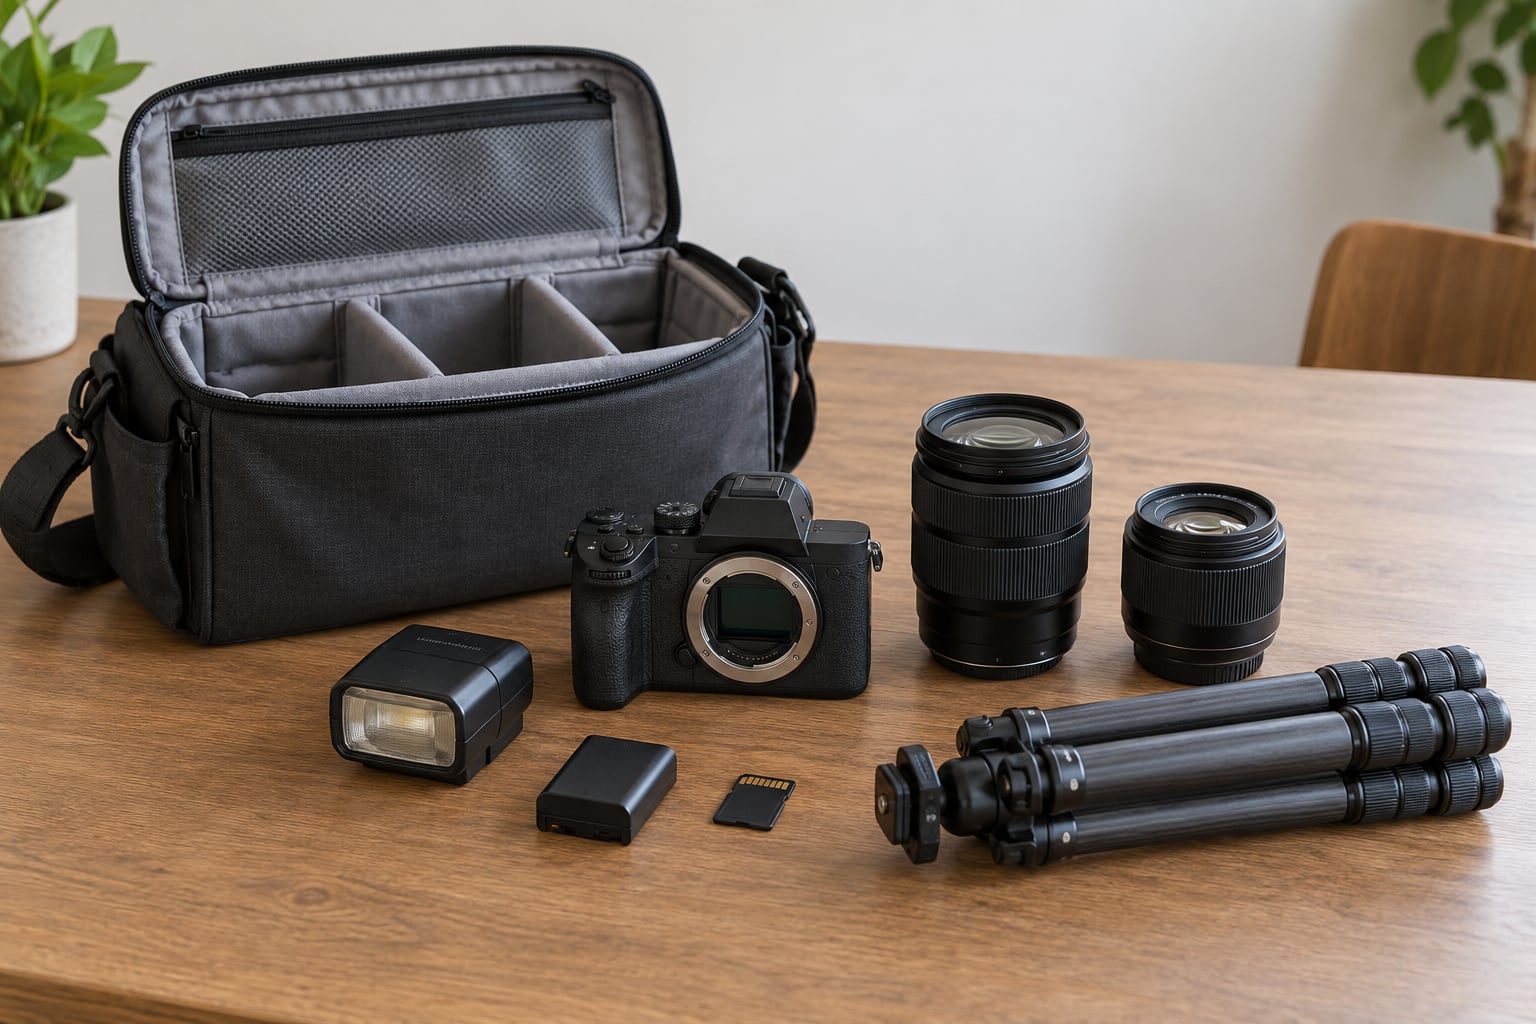
Pack one dependable camera body, a fast portrait prime, a second wider lens for environmental frames, a light source plus something to shape it, spare batteries, at least two memory cards, and a small problem-solving kit. Add client-facing extras like snacks, water and styling clips only when the session calls for them.
That is the honest core answer. A portrait session is paid, time-boxed work, and the gear you forget is always the thing that stops you shooting while somebody waits. Most photographers carry far more than they need, then miss the three items that would have saved the session.
So this guide is organized the way I actually pack: a tiered kit list, a repeatable six-step assembly sequence, and a five-minute check before you walk out the door. What to pack in a camera bag for a portrait session changes with the location and the type of shoot, so the steps below let you strip or add rather than follow a rigid list.
Table of Contents
- What to Pack in a Camera Bag for a Portrait Session
- Step-by-Step
- Common Mistakes
- Frequently Asked Questions
- What is the minimum camera bag for a portrait session?
- Should I bring a tripod for portrait photography?
- How many memory cards and batteries should I pack?
- What should I carry when shooting a portrait session outdoors?
- Do I need a second camera body for portraits?
- How should I organize a heavy camera bag for comfort?
- Conclusion
What to Pack in a Camera Bag for a Portrait Session
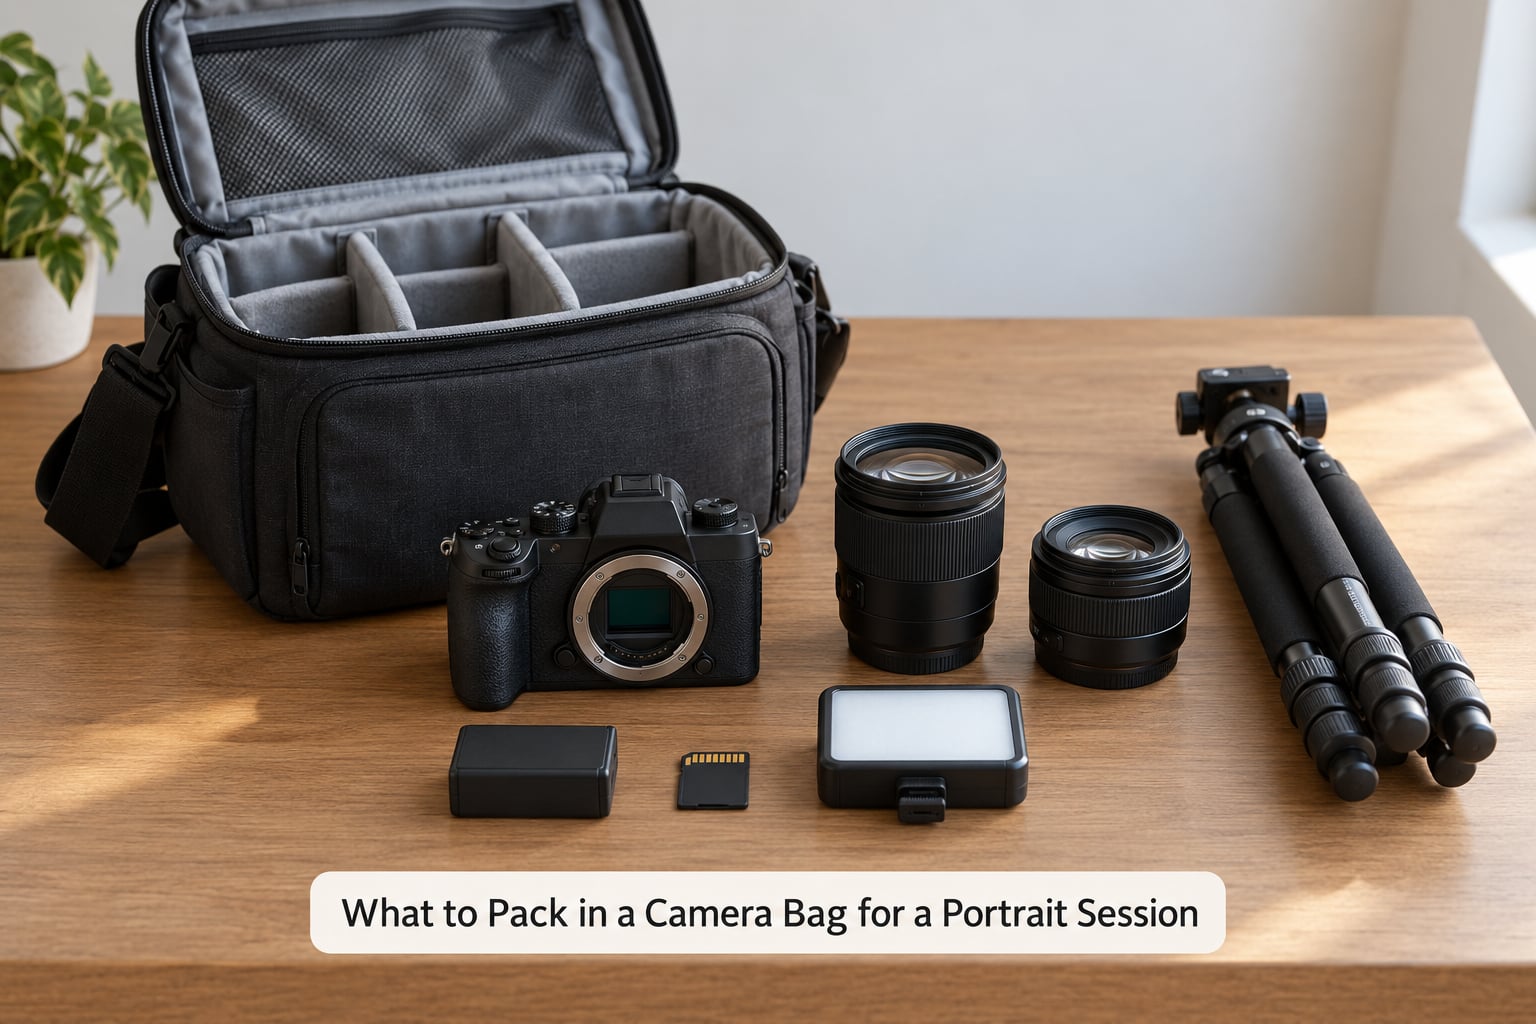
Start from the non-negotiables. Everything in the first group belongs in the bag for any portrait session, whether it lasts twenty minutes in a client living room or a full golden hour on a hillside.
- One working camera body with a charged battery already inside it. Test-fire it the night before, not the morning of.
- A portrait prime, ideally 50mm or 85mm full-frame equivalent, wide open for the soft background separation most clients are paying for.
- A second lens, 35mm or wider, so you can step back for environmental portraits without cropping in tight.
- A light source and a light shaper — a speedlight, a small monolight or a continuous LED, plus a reflector or diffusion panel.
- A trigger or remote if you are using off-camera flash, so you are not standing behind the camera shooting blind.
- Two or three memory cards, formatted in the camera, sized for the session plus a long margin.
- Spare batteries and the charger that matches them. This is where people get burned: pack the battery, forget the cable for its charger.
- Cleaning basics — microfiber cloth, blower, and a small lens cloth that lives in a pocket, not in the bottom of the bag.
Everything below that line is optional and should earn its place by answering a specific question about the session.
Minimum viable kit versus full professional kit
| Item | Minimum viable portrait kit | Full professional kit |
|---|---|---|
| Bodies | One, tested | Primary plus backup body with its own battery |
| Lenses | One portrait prime | Portrait prime, wider lens, backup lens |
| Light | One speedlight or small monolight | Key plus fill or kicker, or a second monolight |
| Light shaping | Reflector or white foam board | Modifier, diffusion panel, flags, stands |
| Power | One spare battery | Two or three spares, charger, power bank |
| Storage | Two formatted cards | Three cards plus a reader or portable drive for backup |
| Support | Nothing, shoot handheld | Compact tripod or monopod |
| Client extras | Water, shot list | Snacks, styling clips, release forms, business cards |
The minimum column is genuinely workable. Plenty of working portrait photographers shoot a full headshot session with a body, one lens, a reflector and two cards. The full column is for the days when something breaks, the weather turns, or the client asks for more than you planned.
Step-by-Step
1. Choose the camera and primary lens
Pick the body you trust most and do not second-guess it on the day. Reliable autofocus and clean high-ISO performance matter more for portraits than raw megapixel counts, because you will often be shooting wide open in whatever light you were given.
Your primary lens choice depends on the style you are going for. For headshots and posed work, an 85mm keeps flattering compression and lets you hold a comfortable distance. For environmental portraits where the location tells half the story, a 35mm gets you close to your subject without a wide-angle stretch at the edges.
One quality prime beats two cheap zooms that are soft wide open. If your budget only stretches to one lens, make it a fast prime and use your feet to control distance.
2. Pack lighting and light-shaping tools
For portraits indoors or in shade, off-camera flash with a trigger is the most portable setup: a speedlight, a small softbox or umbrella, and a stand or a clamp to hold it above and behind your subject. A reflector opposite the light gives you fill without adding gear.
Outdoors in daylight, a speedlight fights the sun. HSS and TTL help, but the light still loses ground as the day brightens, and forum photographers report this frustration constantly. If you know you are shooting outdoors, a monolight or continuous LED gives you exposure you control regardless of the sun.
Pack the modifier you will actually attach, not a range of them. A beauty dish on a monolight handles most headshot work, and a diffusion panel spreads harsh window light or midday sun. A small white reflector costs almost nothing and fixes more problems than another flash head.
3. Add support, storage, and power
A compact tripod or monopod earns its weight on longer lenses, group frames and any low-light situation where you need a second or two of exposure. If your session is handheld all the way, leave it in the car. Gear that rides in the bag without a purpose is just weight on your shoulders and a bad back by hour three.
Cards are cheap. Two or three is the answer, and format them in the camera before the session rather than trusting a card formatted in a different body. If your camera has dual card slots, use them — mirrored or overflow writes protect a whole session from a single corrupted card.
Bring the charger that matches your spare batteries, plus a cable for it. A power bank covers the phone-and-card-reader reality of on-site backup better than a second charger does.
4. Build a backup and problem-solving kit
A backup body only makes sense if you will actually use it, which usually means you shoot paid work where a failure costs you a client’s day. If you bring one, pack its battery, a card and a lens-cap-free body cap, and test that it fires.
The problem-solving kit is cheap and prevents most disasters. A microfiber cloth and blower handle a dusty lens. Gaffer tape fixes a loose light modifier, a sagging tripod leg or a strap. Cable ties group trigger cables and close a bag zipper that has started to flap. A tiny screwdriver set covers a loose tripod plate.
Duplicate your cards. If you use a card with a plastic ribbed edge, some photographers have reported losing files to a cracked rib, so favour cards with a full enclosure. Keeping the two cards you actually formatted is more useful than owning five.
5. Pack for comfort, weather, and the location
Weight distribution decides whether a bag is manageable. Put the heaviest items low and close to your back panel, keep the bulky flash gear vertical along a side wall, and reserve the top pocket for things you need in seconds: spare batteries, a card, a cloth, the trigger.
Heat, cold and water each need a different answer. In cold weather, batteries drain faster, so carry spares in a pocket close to your body rather than loose in a cold bag. In summer heat, keep cards out of a parked car, because a car interior can ruin them fast. For rain, a pack cover beats an umbrella, since both hands need to stay on the camera.
Count the walk before you pack. Stairs, a long beach approach or a venue with no elevator change your kit list more than any gear review will. If the location has stairs and no backup hand, leave the second lens in the car.
6. Run a final five-minute camera-bag check
Do this in the same order every time, and it takes five minutes:
- Every battery charged and at least one spare for each body in a pocket, not a compartment.
- Cards formatted in camera, in the slot you intend to use, with dual slots filled if you rely on them.
- Card storage clear enough to shoot a full session without stopping.
- Front and rear lens caps on, body cap on the backup body if you packed one.
- Weather protection in reach: pack cover, rain sleeve, or a plastic bag for the bag.
- Settings sane: aperture, ISO, shutter speed, focus mode checked on the first frame.
- Full inventory counted aloud against this list, then the bag closed and re-checked for anything at your feet.
The last item is the one people skip. Count it out loud, and you will catch the lens you set on the table twice.
Common Mistakes
Overpacking is the most common one. Forum threads on this topic keep circling the same regret: a bag so heavy it hurts after a short walk, full of gear that never left the bottom compartment. Fix: build the minimum kit first, then add only items that answer a question about this specific session.
Relying on a single card or a single battery. One dead battery mid-session ends the work while the client waits. Fix: two batteries minimum, two formatted cards, and if your body has dual slots, use them.
Bringing the wrong lens for the style. A single wide zoom for a headshot session leaves you either too close or too far. Fix: match focal length to the frame you are delivering before you leave the house.
Leaving weather protection behind. A drizzle ruins a session and a damp sensor ruins the lens. Fix: the pack cover rides in the top pocket from the first shoot, even indoors. It weighs nothing.
Poor weight distribution. A bag with the heavy stuff at the top pulls you forward and ends the session in shoulder pain. Fix: heavy low and close to your spine, quick-access items on top.
Not testing backup equipment. A backup body you packed last-minute is not a backup. Fix: fire the shutter on it, check the battery is charged for that body specifically, and confirm the trigger fires your light.
Frequently Asked Questions
What is the minimum camera bag for a portrait session?
The minimum is a tested camera body, one fast portrait prime, two or three formatted memory cards, a spare battery with its charger, a small reflector, and a cleaning cloth. That covers a headshot or short posed session indoors or in shade. Everything else — second lens, monolight, tripod — answers a specific question about the location, so add it only when you already know you will need it.
Should I bring a tripod for portrait photography?
Bring one when you shoot low light, long lenses, group frames, or any session where you may want a second or two of exposure. A compact tripod or monopod fits in the side of a backpack and turns handheld shakes into usable frames. Leave it in the car for bright daylight close-range headshots, where carrying it only costs you weight.
How many memory cards and batteries should I pack?
Two or three memory cards and two spare batteries is a solid floor for a paid session; one body plus one spare battery covers a short indoor shoot. Format the cards in the camera beforehand, use both dual card slots if your body has them, and keep one spare battery in a pocket against your body so cold weather does not drain it.
What should I carry when shooting a portrait session outdoors?
Outdoors, add a monolight or continuous LED if you can, because off-camera flash loses power against daylight. Bring a pack cover, extra layers for your subject, a plastic bag for the bag itself, and one more battery than you think. Also carry the shot list and water, and decide your backup indoor location before you arrive.
Do I need a second camera body for portraits?
A second body is insurance, not an accessory. It makes sense when you shoot paid work where a failure costs a client their day, or when you carry two lenses you cannot afford to lose. If you bring one, pack its own battery and card, test that it fires, and drop something else to pay for the weight.
How should I organize a heavy camera bag for comfort?
Put the heaviest items low and close to the back panel so the load rides on your hips instead of your shoulders. Stand tall items such as a monolight and folded stands along the sides, use the quick-access top pocket for spare batteries, a card, a cloth and your trigger, and leave water, snacks and jackets in an outer pocket or the car.
Conclusion
Choose your camera and portrait prime first, then add one light, one light shaper, cards, batteries, and a cleaning kit. Everything past that is a decision you make per location, not a permanent part of the bag.
When you are done choosing, pack heavy low and close to your back, keep batteries and a card where you can reach them without thinking, and run the five-minute check before you leave. That check is the difference between a camera bag checklist and an actual camera bag you can depend on in 2026.