If you are working out how to go back and reshoot an old project, start by treating your earlier work as a brief, not as a memory. You audit what failed, recover the original files and their settings, return to the same spot with the same lens, and shoot a deliberate second version that documents both the change in the scene and the change in your eye. Most projects take two to six weeks of intermittent work, and the hard part is deciding what the new version should be before you lift a camera.
The technique has a name. Retaking a photograph you made years ago, from the same position and with the same framing, is called rephotography, or repeat photography in visual anthropology. It is not restoration (repairing a damaged or faded scan), not re-editing (opening the old file with better software), and not AI upscaling. It is going back with a camera.
Below is the process I would follow, stage by stage, with the test for whether each stage actually worked.
Table of Contents
- What You Need to Go Back and Reshoot an Old Project
- Step-by-Step
- Common Mistakes
- Frequently Asked Questions
- Should I reshoot an old project or leave it as an archive?
- How do I approach former participants for a photography reshoot?
- Is it better to repeat the original setup or change it completely?
- How many photographs should a finished reshoot include?
- What if the new version is worse than the original project?
- How long should a photography project take to complete?
- What is it called when you retake a picture years later?
- Conclusion
What You Need to Go Back and Reshoot an Old Project
You need less than most people assume, and more discipline than any equipment list can give you. Here is the honest prerequisites list before the first stage begins.
- The original photographs, in the highest quality you still have. RAW files if they survive, scanned negatives if not, prints as a last resort. A JPEG that has been through three messaging apps is not a reference, it is a rumour.
- The original brief or notes. Even three lines. What were you trying to prove, and for whom?
- Contact sheets or a sequence view. You cannot judge a project from its best frame. The failure is usually in the four frames nobody chose.
- A written current goal. One sentence saying what this second attempt is for: skill documentation, a portfolio piece, a book page, an archive record, or a closure exercise.
- Access and permissions. A location you can legally and safely return to, and consent from any recognisable person in the new version.
- A schedule with dates on it. Light, seasons and people’s calendars are the real schedule. Yours is not.
- Basic kit that works. The same lens as before if it still exists, a tripod, a way to judge colour, and enough storage for two full sessions.
- Two backups before the shoot, not after. One local, one off-site. Files have died in drawers and drawers have flooded.
If you can list those eight things on one page, you can start. If you cannot find the original files, read the FAQ answer on reshooting without negatives before you invest a weekend in a location that may no longer exist.
Step-by-Step
Seven stages, each with its own exit condition. Do them in order, because skipping ahead is what produces a second batch of images that fail for exactly the same reason as the first.
1. Revisit the original project without judging it
Put the original sequence in front of you as a document, not as a portfolio piece. Read your own notes. Look at every frame, including the ones you never posted.
Write down what the first version was trying to achieve, in your own words, before you decide what was wrong with it. This is the step most people skip, and skipping it turns a reshoot into a remake of a memory rather than a response to an argument.
Then split what you find into two lists: constraints that still hold (the location is genuinely striking, the subject is worth the effort, the sequence length is right) and assumptions that have expired (the light idea, the lens choice, the habit of shooting the same three angles). Only the second list gets thrown away.
Evidence this stage worked: you can state the original intent in one sentence, and you have a named list of what you are keeping.
2. Diagnose what stopped the project
Most abandoned projects did not fail for the reason you think. They ran out of access, ran out of light, ran out of money, or ran out of interest in a subject once the novelty wore off. Diagnose the category before you decide the treatment.
Separate creative problems from logistical ones. A crooked horizon, a missed focus, a flat light angle and a weak composition cannot be fixed in software, so they justify a return. A scanner that lost shadow detail, a bad crop from a rushed export, or an edit made on a dull afternoon can be fixed in about forty minutes.
- Crooked or tilted horizon. Post can fix it. Not worth a return on its own.
- Weak crop or bad framing. Post can partly fix it if there is room at the edges. Worth a return when the composition itself was wrong.
- Flat or ugly light. No amount of editing rescues it. Worth a return, and this is the most common reason people go back.
- Missed focus or motion blur. Nothing to fix in post. Worth a return.
- Failed scan, no negatives. Partly recoverable, worth a return if the original scene still exists.
- Edit made in a hurry. Fully fixable at the desk. Stay where you are.
- Subject no longer available. Only worth a return if you can re-stage it honestly.
Also name the real blocker, because it determines the treatment. If the original failed on access, a reshoot is a negotiation. If it failed on your own motivation, a reshoot is a contract with yourself.
Evidence this stage worked: you can name one primary cause, and you have decided whether you are returning, re-editing, or letting the project stay an archive.
3. Write a new creative proposition
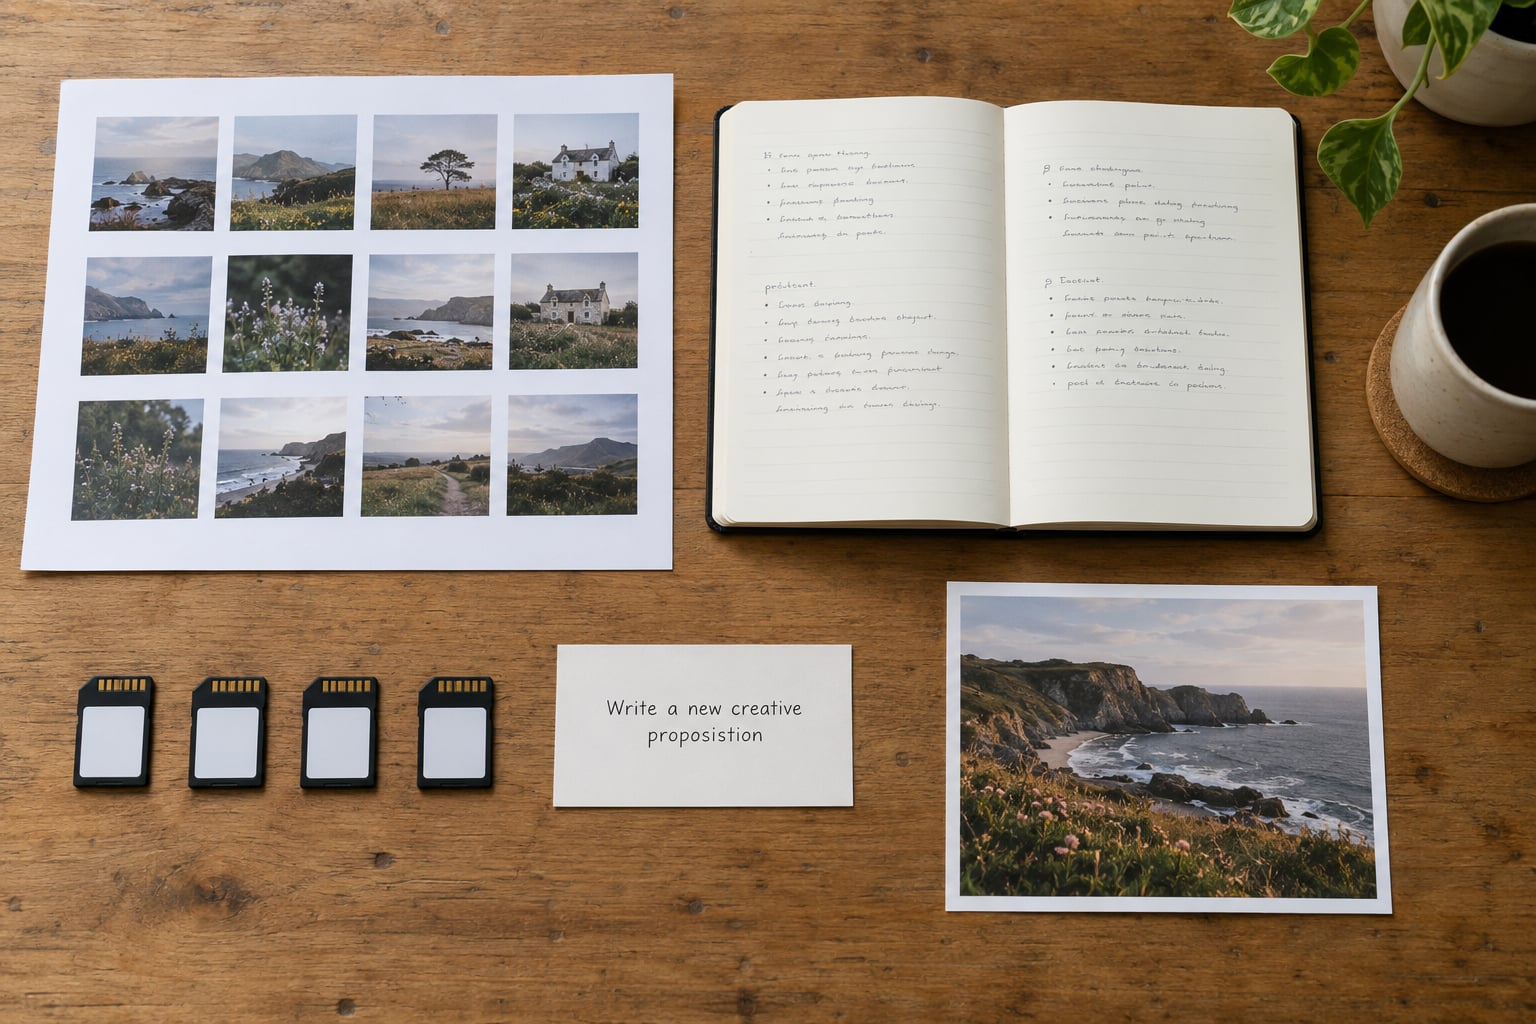
This is where most reshoots die. Without a written proposition, you walk back to the location and repeat the first project exactly, flaws included, then wonder why you feel flat about it.
Write the new version as an assignment. Five components, one page:
- Subject. What is actually in the frame, described precisely enough that someone else could set it up.
- Emotional register. One adjective. Clinical, tender, confrontational, observational. This decides your light before your equipment does.
- Visual method. How the images get made. Available light, one reflector, a single fixed setup, hand-held, long exposure.
- Viewpoint. Your physical relationship to the subject. Where you stand, how high, how close.
- One meaningful change from the first attempt. Exactly one. A new time of day, a new season, a lens you never would have used, a subject who is doing something instead of posing.
One change, not five. Five changes is a new project with no relationship to the old one, and the comparison stops being interesting.
Evidence this stage worked: someone who has not seen your original series could read your one-page proposition and predict roughly what the images will look like.
4. Recruit participants and secure access
This is the stage with the most failure modes, because other people have to say yes. Handle it in a specific order: approach, explain, ask, confirm in writing, schedule, then plan for the worst.
Approach former participants honestly and with the change to your own work as the reason. People are more willing to return for a second attempt than for a repeat, and they are less willing when the first attempt failed publicly. If the original images were published, say so plainly before you ask.
Confirm permission in writing, covering publication, commercial use if that is a possibility, and how long consent lasts. If anyone is recognisable and does not consent, change the frame or the plan. No exception is worth a complaint.
For a location, get the access sorted before you commit a date: opening hours, permission from a property owner or council, whether tripods or reflectors are welcome, and where you can stand without blocking anything. A restricted spot ruins the alignment more often than a changed lens does.
Then build the backup plan. A named second date, a second location, a rain call, and a shot list that survives a shortened session. Photographers lose more reshoots to a no-show than to a technical fault.
Evidence this stage worked: you have written consent, a confirmed date, a fallback date, and a list of the frames that must be captured if you only get half the time.
5. Build a reshoot checklist and test the setup
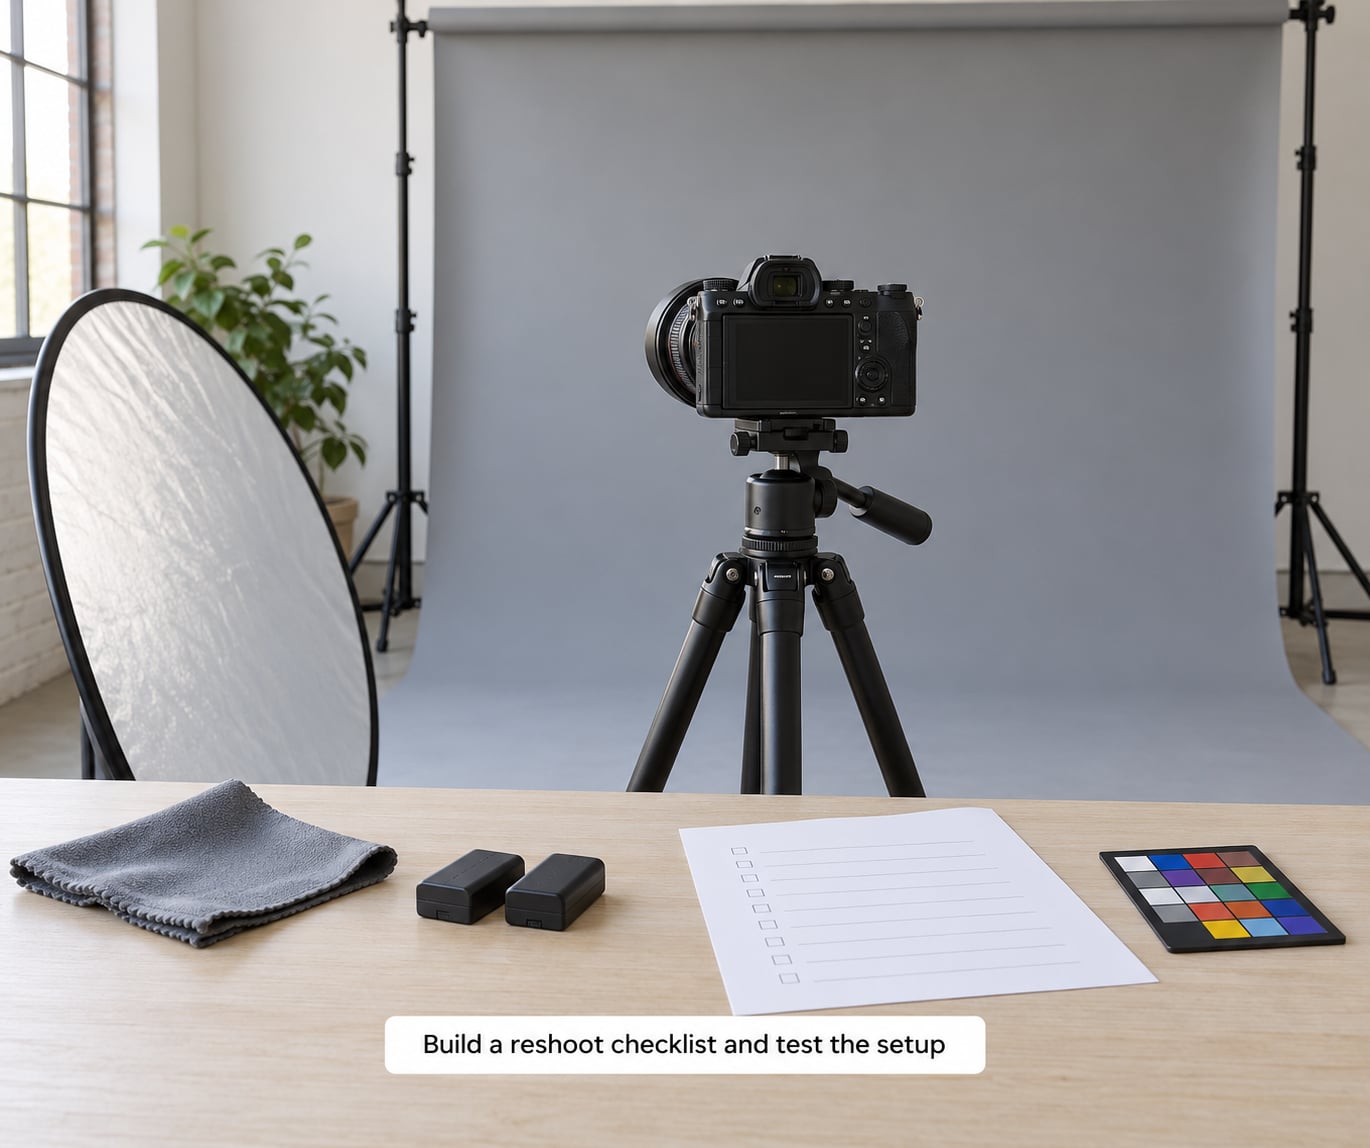
Checklist first, camera second. One page, carried on paper, covering: location and parking, permissions, wardrobe and props, lighting and stands, camera body, lens and focal length, batteries and cards, the shot list, contact sheet or backup review method, and the storage and backup path for the session.
Then test the setup at the location before the real date if you can. Thirty minutes is enough to answer the four questions that actually matter: does the framing line up, is the exposure right, is focus where it needs to be, and can you work this way for two hours without losing the light.
Two things are worth doing deliberately if you are matching an original frame. Note the focal length from the EXIF data of the original file, and mark your tripod position on the ground. Then, before the session, stand on the mark and line the viewfinder up with the printed original, adjusting until the fixed objects in the frame line up. That alignment exercise takes five minutes and saves an hour of guessing.
For light, work backwards from the original. Read the shadows in the old frame to tell you where the sun or the main source was, then plan to arrive roughly an hour before that angle repeats on your date. It will not be identical. It does not need to be.
Evidence this stage worked: you can point at the setup and explain what each element is doing, and the shot list fits the available light window.
6. Shoot the new sequence with purpose
Work from the proposition, not from the old contact sheet. The old frames are a reference for position and subject, not a list to tick off.
Vary viewpoint on purpose. After the matching frame, move higher, lower, closer and further, and shoot each of the core set-up positions at least once. Capture both horizontal and vertical options, because a vertical crop of a matching frame often rescues a composition that a straight pair would not.
Protect the sequence over the single frame. Set yourself a rule: the matching frame gets a proper attempt, then you move on regardless. Chasing one perfect alignment until the light is gone is the most common way a reshoot ends with two images and no series.
Shoot the extras that make the pair honest: the wider view, the detail, the frame with the new thing that has appeared in the scene since the original. If a building is gone or a road has widened, that belongs in the series, not hidden out of embarrassment.
Evidence this stage worked: you have a set of images that covers the whole idea, plus the matched frames, plus the changes nobody planned.
7. Edit, compare, and define completion
Compare the new images with the first project, but do not treat the old edit as the standard. You are not competing with a version of your work you made with less experience and worse tools. Where the original edit was the problem, that is a reason to let the new edit differ.
Match what serves the pairing: similar aspect ratio, similar crop logic, similar tonal weight. Where the new work is stronger, let it be stronger. A reshoot where the new version is worse in every measurable way is a diagnostic result, not a failure, and it belongs in your notes.
Select for sequence. Read the whole set as a run, then cut anything that repeats a frame without adding information. Apply one consistent finishing process across the set, including across the pairs, so the two eras differ because of the photographs and not because of a slider.
Set completion criteria before you start the final edit, in writing, so the project can actually end. A workable version: a named count of final images, a named count of pairs, a single finishing pass applied to all of them, a written caption for each frame with date, location and the change being shown, and an archive copy of the original files stored beside the new ones. When those five things exist, the project is done, whatever the weather was.
Evidence this stage worked: the pairs are captioned, the originals are archived, and you have a date on which the project is finished.
Common Mistakes
These seven failures account for most abandoned second attempts. Each has a fix you can apply before the next session.
Repeating the first concept literally. You return with the same lens, the same angle, the same light and the same pose, and produce a slightly worse copy. Fix: write the proposition first, and change exactly one element on purpose.
Changing everything at once. A new lens, a new location, a new subject and a new look produce a project with no readable relationship to the original. Fix: one change, documented, everything else held constant.
Recruiting participants too late. You have a date before you have a yes, and a no-show leaves you with a tripod and no series. Fix: confirm people and permissions before the date is announced, then hold a backup date.
Over-shooting. Six hundred frames, forty keepers, no decisions left to make. Fix: shoot the shot list in order, review at lunch, and stop when the list is covered.
Ignoring consent and safety. Recognisable faces without permission, or a restricted spot because it was the only alignment that worked. Fix: written consent before the session, and a second position ready for every matching frame.
Comparing against a different old edit. The new work looks weak next to a file you re-edited last year. Fix: re-edit the original to your current standard first, then compare like with like.
Continuing indefinitely. The project stays open because finishing it means admitting something. Fix: the five completion criteria in step 7, with a date attached.
Three tips worth keeping. First, the most repeated piece of advice in photographer discussion is to shoot your reshoot options during the original session: extra exposures, alternate angles, a bracketed set, because a return is easy when the alternatives were captured on the day and impossible when they were not. Second, small re-stagings often beat grand remakes. One exhibition came from an older personal series simply reworked to fix the smallest flaws the maker could still see, which is a legitimate and much cheaper version of a reshoot. Third, honest limits build more trust than enthusiasm. Say plainly that you cannot get those people, that season or that light back, and show the difference instead of hiding it.
Frequently Asked Questions
Should I reshoot an old project or leave it as an archive?
Reshoot when the failure was baked into the exposure: flat light, missed focus, a subject who was not right. Leave it as an archive when the images are sound and your interest has simply moved on, because an archive is a legitimate outcome. The test is whether you can name a specific technical fault. If you cannot name one and only feel vague disappointment, re-editing or archiving will serve you better.
How do I approach former participants for a photography reshoot?
Explain the change in your own work as the reason, and be specific about what the session involves, how long it takes and how the images will be used. People respond better to a request that names the new idea than to a vague plea to help again. Confirm permission in writing, cover recognition and commercial use, and offer a date they can actually attend rather than a window.
Is it better to repeat the original setup or change it completely?
Repeat the setup and change one thing. Holding position, lens and light stable makes the differences that remain readable, whether they come from the scene or from your improved eye. Changing everything produces a set that cannot be compared with the original, and comparison is the whole reason for returning. Pick your single change before the session and note it in the caption.
How many photographs should a finished reshoot include?
Enough to hold a sequence and enough to pair. For most personal projects, six to fifteen pairs works, with a handful of wider and detail frames around them. Fix the number in writing before the edit so you have a stopping point. If you find yourself adding frames to fill a count, the count is the wrong number and the sequence will read as padding.
What if the new version is worse than the original project?
Then it is useful information, and you should keep it. A weaker second attempt usually means the proposition was vague, the light was wrong, or the original was better for reasons you have not identified yet. Archive both versions with a short note on what changed in your eye between them. Many photographers find the honest comparison more moving than a clean improvement.
How long should a photography project take to complete?
Long enough to return at the right light, short enough to stay finite. For most revisits that means two to six weeks of intermittent work: a week to audit and write the brief, a few days recruiting, one or two sessions, then a fortnight for editing and captions. If the project has no date by week four, it has no completion criteria yet. Write those down first.
What is it called when you retake a picture years later?
It is called rephotography, and in visual anthropology the method is known as repeat photography: locating the camera position of an earlier photograph and shooting a new frame from that same position to show change over time. It is distinct from restoration, which repairs a damaged or faded image, and from re-editing, which reworks the original file. If you are working out how to go back and reshoot an old project, this is the practice you are in.
Conclusion
Going back to an old project is a short process with hard edges: audit the original without judgement, name the one thing that stopped it, write a new proposition with exactly one change, secure people and place, test the setup on site, shoot for the sequence, and finish on a written set of criteria. What cannot come back, comes back anyway: the same spot, the same light angle, the same viewpoint, and the difference between the two versions of your own eye.
Start today rather than on a good weekend. Pull up one unfinished series, write the sentence describing what it was trying to do, diagnose the failure, and rewrite the brief as a new assignment. If the work is still sitting in a folder three months from now, nothing about it will have improved on its own.